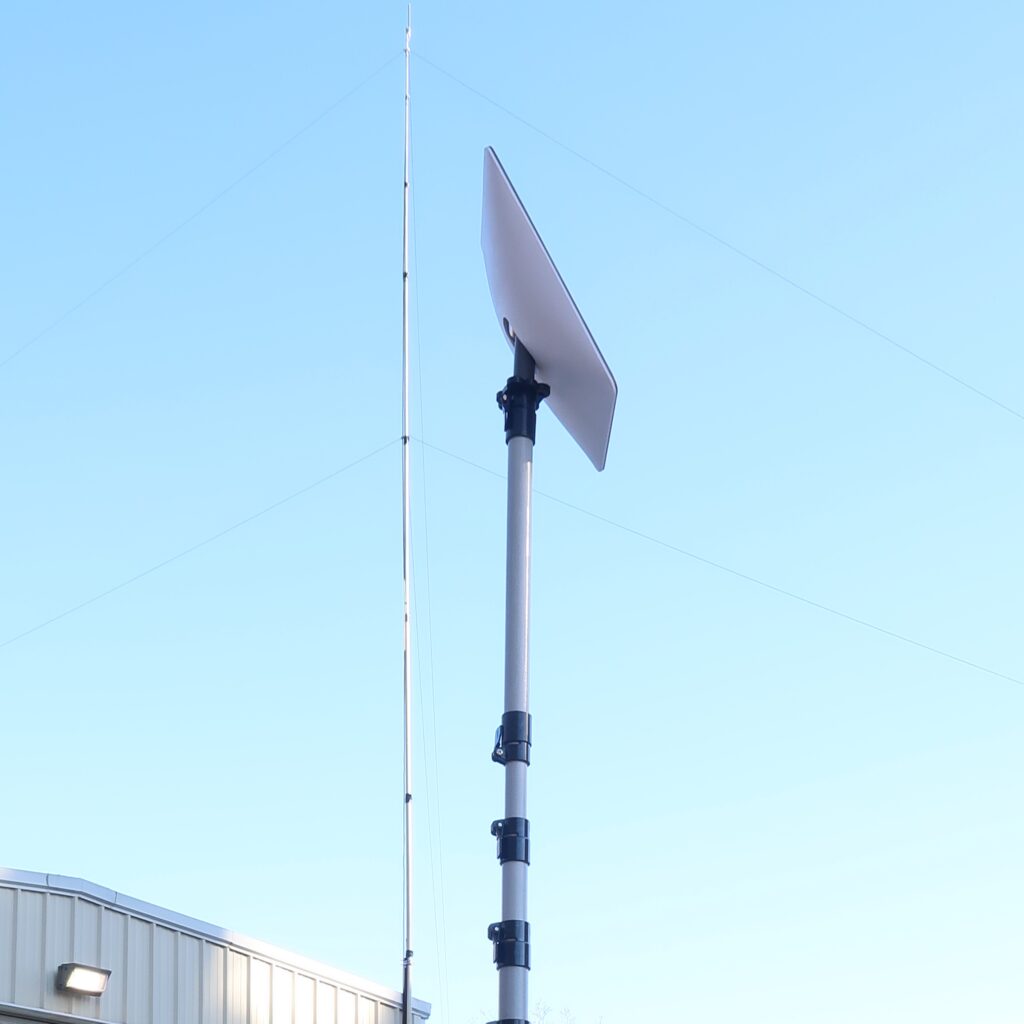
Starlink requires a clear view of the sky in a wide arc to have an uninterrupted satellite signal. Many homes, campsites and workplaces don’t have an easily accessible location to mount a Starlink dish with this wide arc of unobstructed sky. Scenarios like this are where a push-up mast can be utilized to get elevated above these obstructions. A fiberglass mast is the best way to go as the feed line can go through the center of the mast and not add to an already high lightning target. The mast is completely non-conductive and will help add to the longevity of the Starlink setup. Further down we will talk about what you would need to get this done. Let’s get into it.
Verify which Starlink Dish you have:
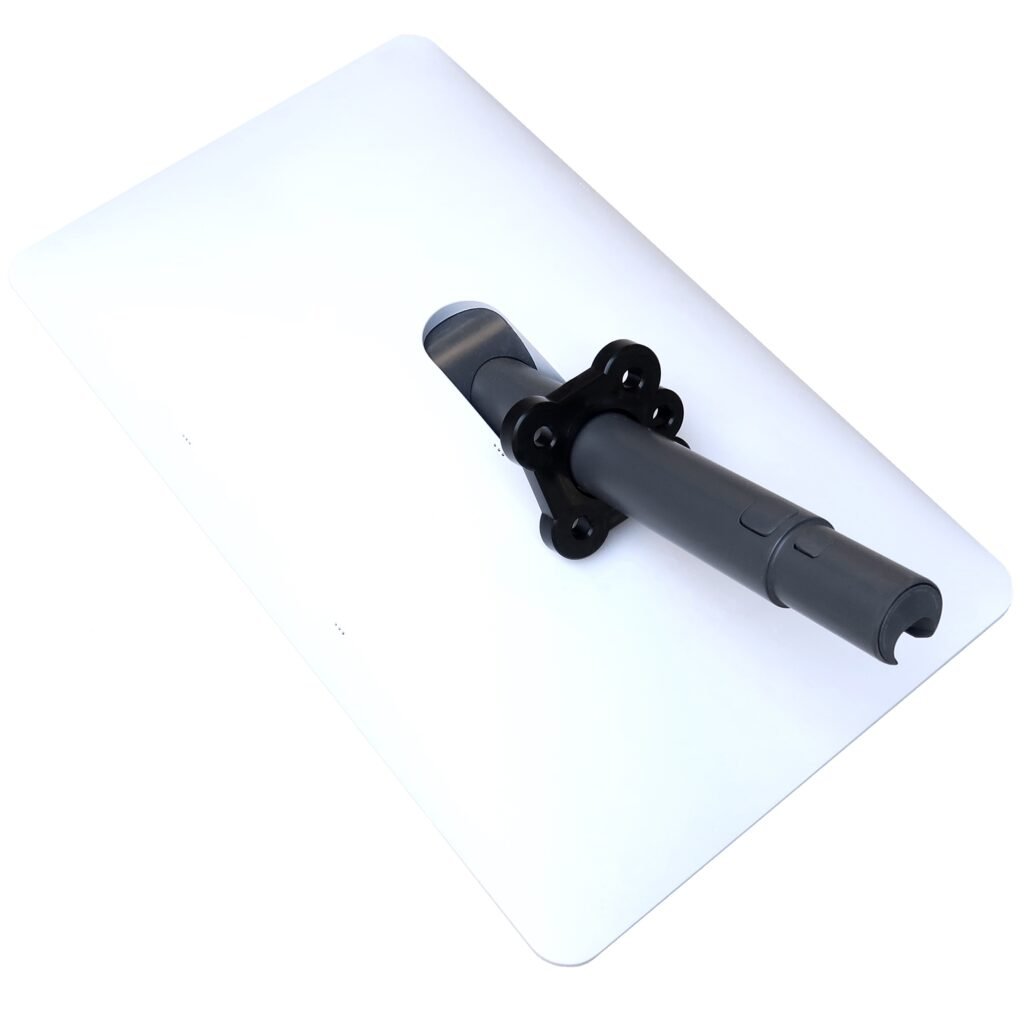
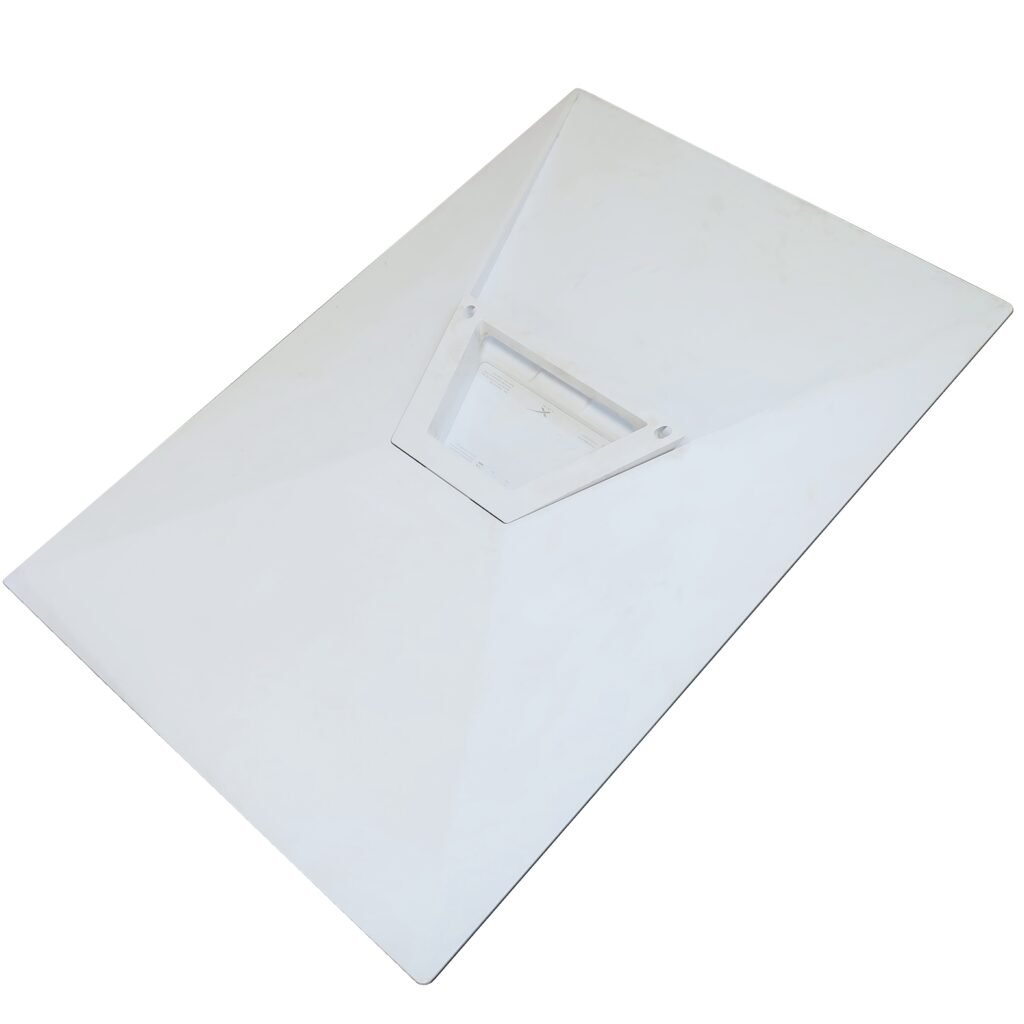
This article is for the installation of a Gen2 Starlink dish on to our Ultra Heavy Series of fiberglass push up masts. The Gen2 Starlink Dish has a 1.5 inch OD Round shaft coming out of the bottom of the dish.
If you have a Gen3 Starlink Dish, see our latest article: How to install Starlink Gen3 on a mast. See what the dish looks like below:
End Result Drawing and Diagram of Gen2 Dish
Look below to see the diagram of a completed full setup. Some items are certainly optional depending on the setup, but the below setup is complete for a ground-based system where you do not have a structure nearby or on top of a structure.
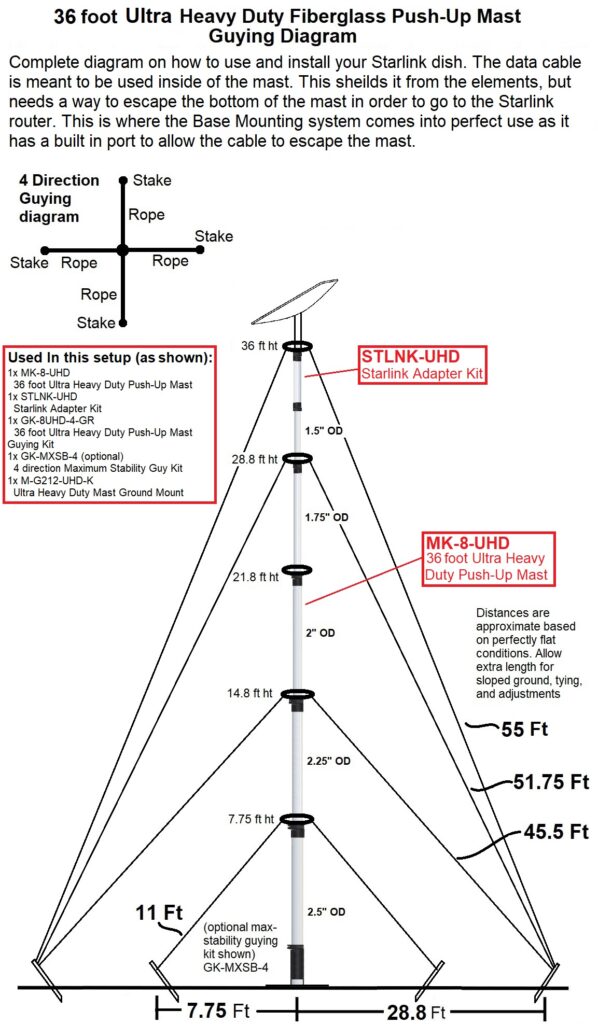
Here is a complete list as shown above:
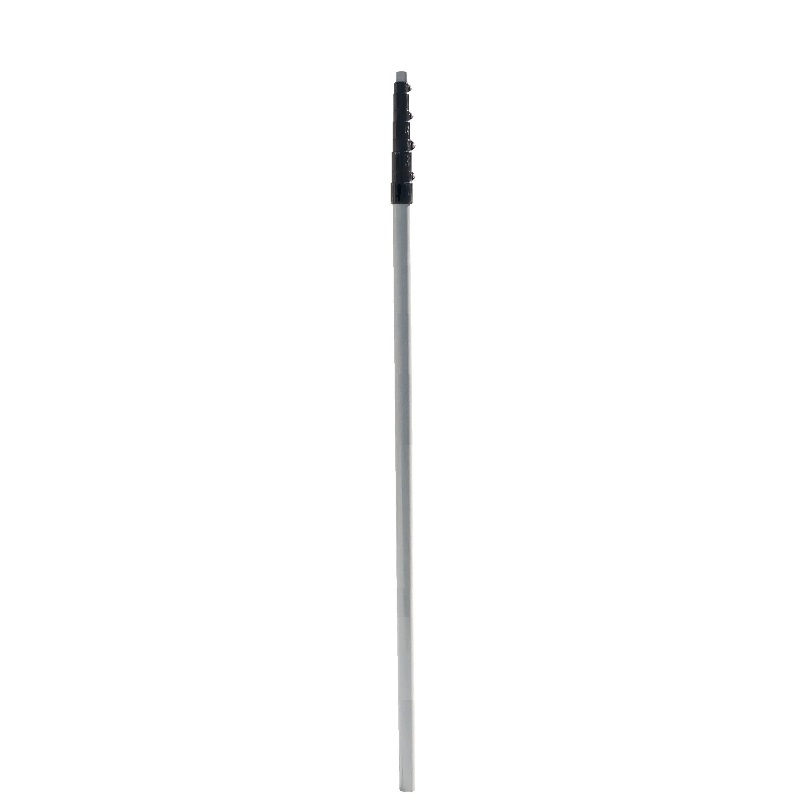

1x MK-8-UHD, 36 foot Ultra Heavy Duty Fiberglass Push-Up Mast
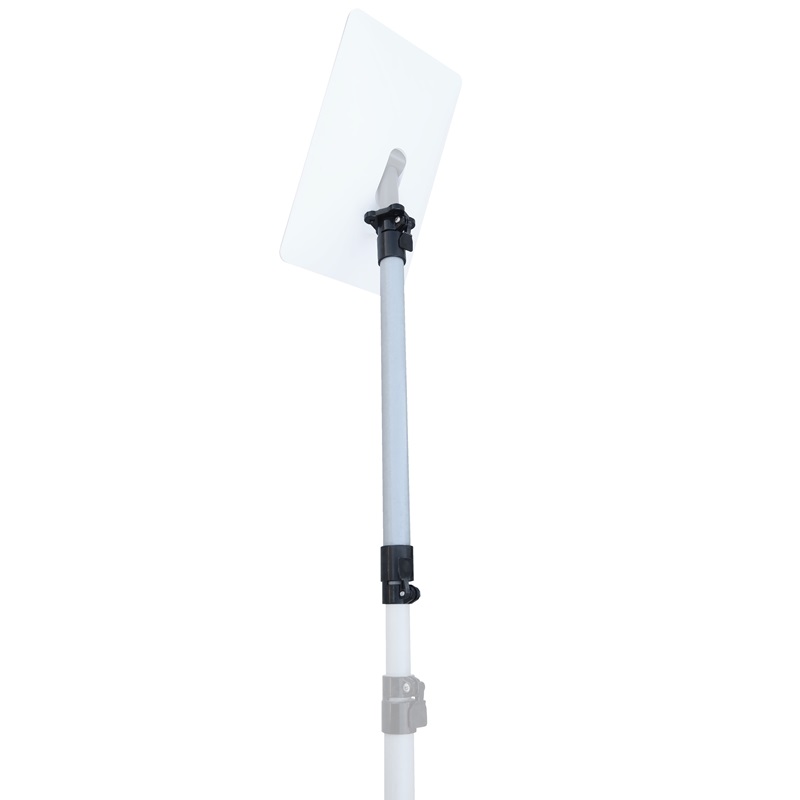
1x STLNK-UHD, Starlink Adapter Kit
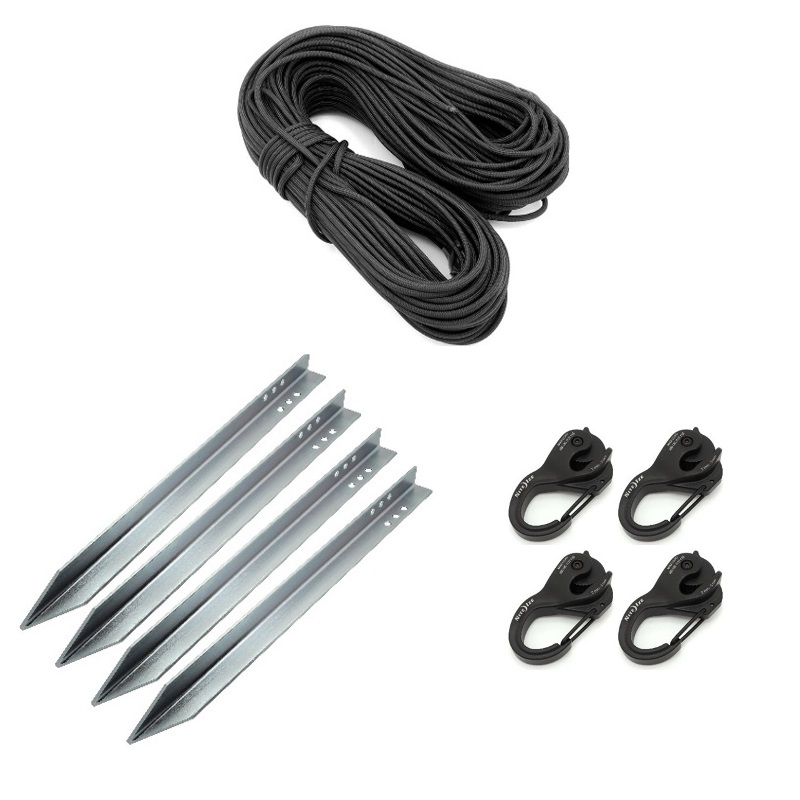
1x GK-8UHD-4-GR, Guying Kit for the 36 foot UHD Mast
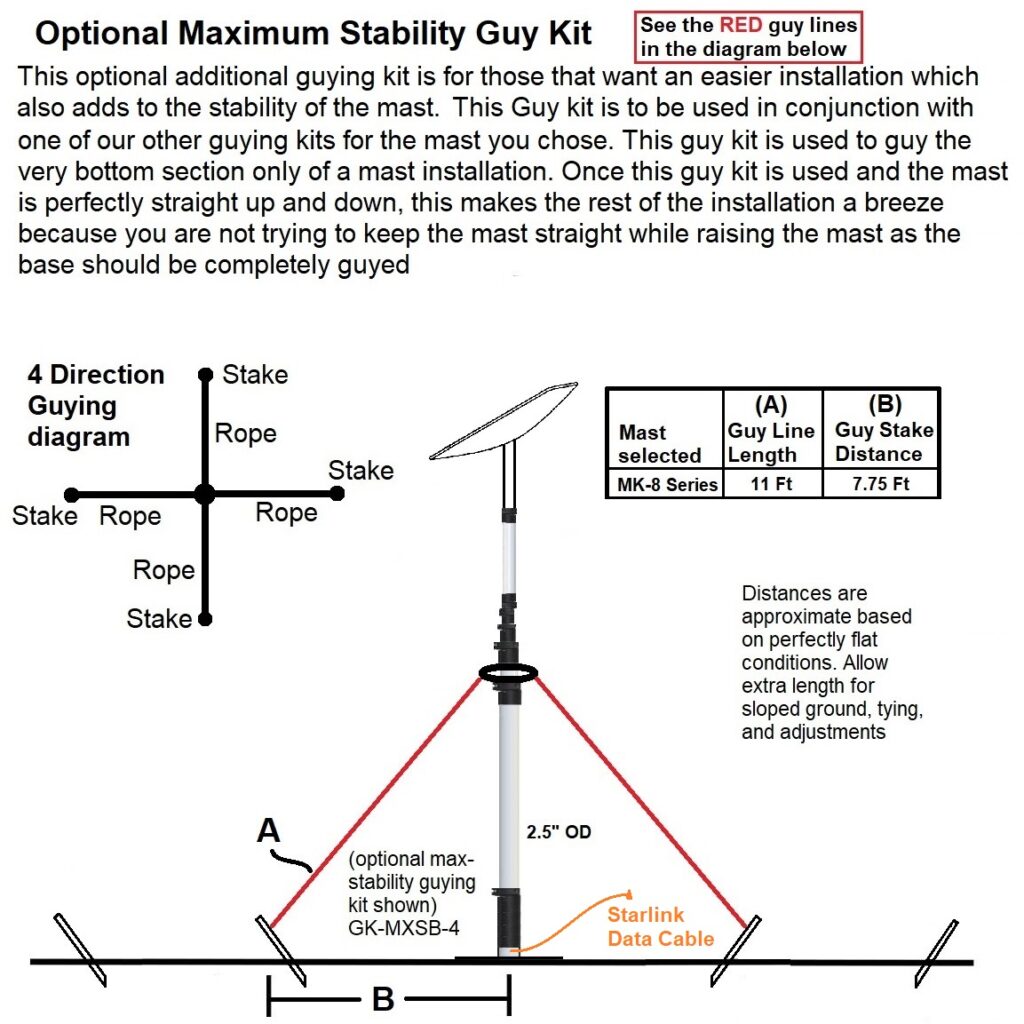
1x GK-MXSB-4, Maximum Stability Guying Kit (optional)
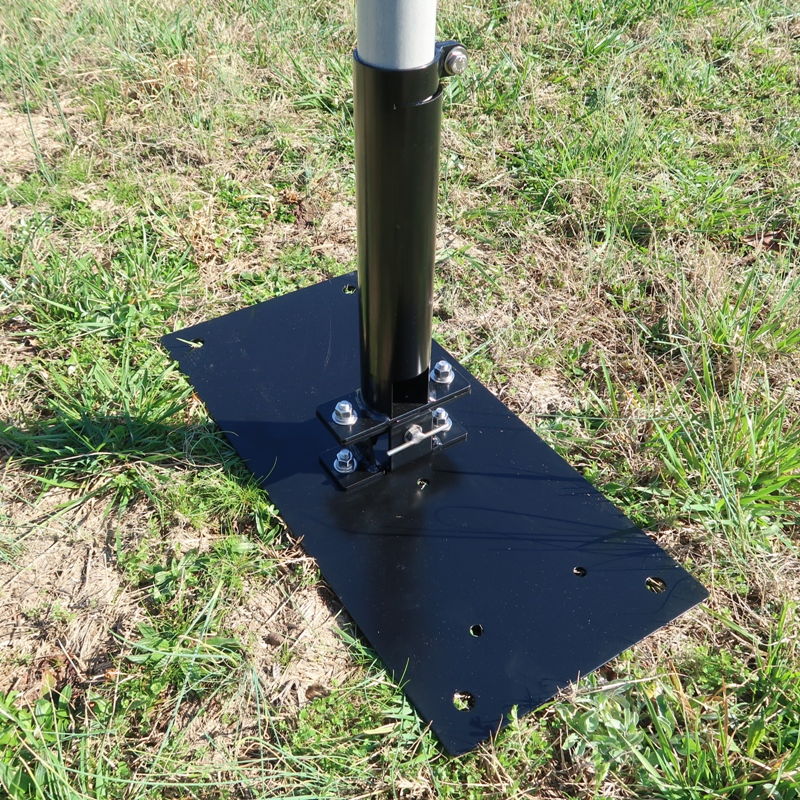
1x M-G212-UHD-K, Ground Mount Base Kit (optional)
Getting Started – Assembling the various kits
Both the MK-8-UHD mast and the STLNK-UHD gen2 adapter will require a little assembly. For the mast, see this Assembly Article for the quick assembly instructions. For the Starlink Gen2 to UHD mast Adapter Kit, see its product page and scroll down for its quick assembly that can be done at the same time as the mast. Once the Mast Clamps are installed onto the tubes of the mast and assembled, you are ready to put the tube sections together. Be sure to have the guy ring set that would have come with the Guying Kit close by. This is the ideal point where you would sleeve them between the mast sections.
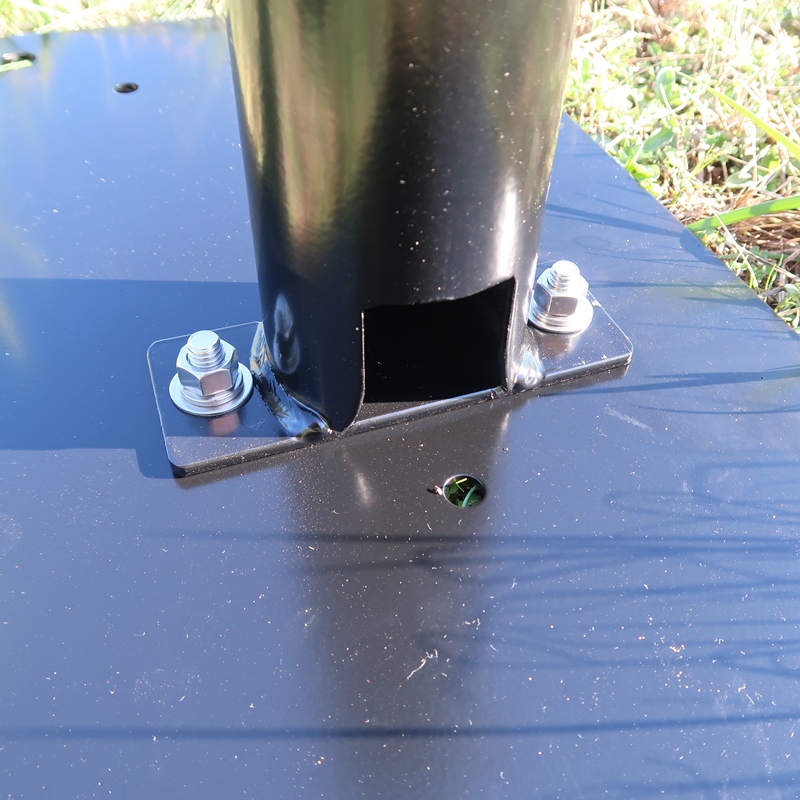
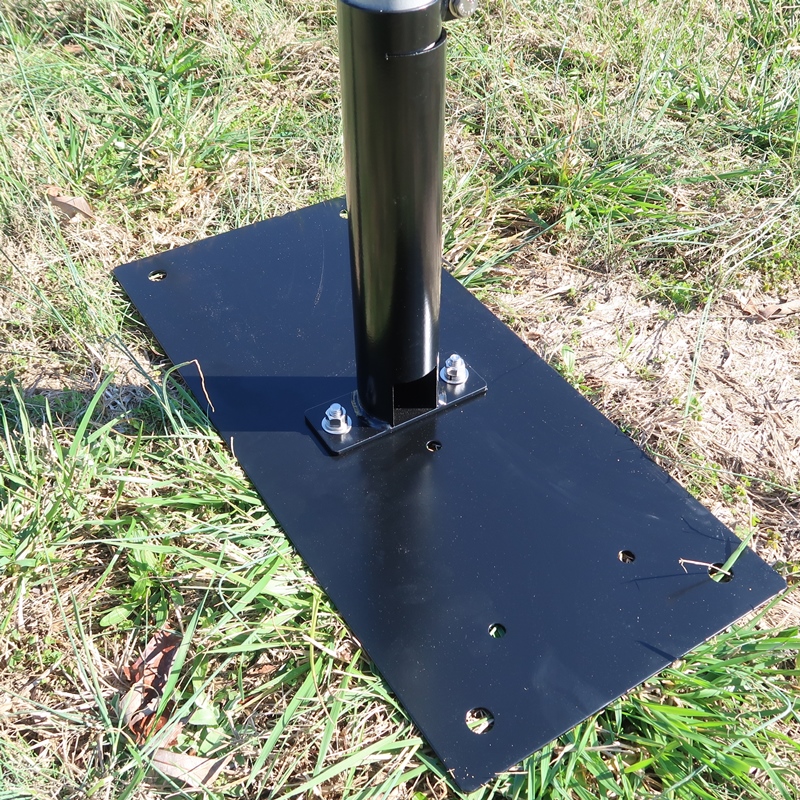
Because we will NEED to sleeve the data cable through the mast, this is where the Ground Mount Kit will come in handy. It has a built-in port at the base for the data cable to go through and up the mast. Otherwise, you would have to fashion something that would have this capability.
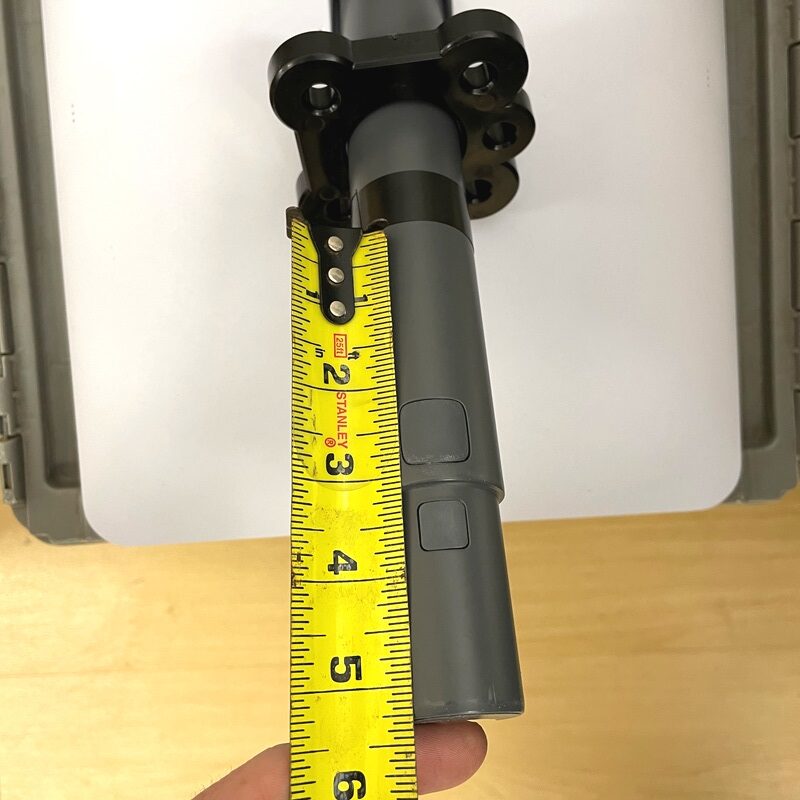
Next, take the Starlink Gen2 dish and the guy ring that goes along with the Starlink Adapter kit. We need to mark a line around the 1.5-inch diameter portion of the Starlink dish which will act as a point for the Starlink adapter kit to stop at. You will not want to let the Starlink Adapter Kit to go further up the Starlink dish so that the guy lines do not obstruct the movement of the dish in either direction. The bottom of the line should be no further than 5.25 inches up the shaft of the dish. I made the mark using a wrap of black electrical tape, but you could also use a marker. This is also when you would place the guy ring onto the shaft of the dish.
Sleeving the Data Cable Assembly Steps
Once the Ground Mount is assembled, we can start to put all of it together to get it into the air. Have at the ready: the mount, the mast, the Starlink adapter, the Starlink dish, and the Starlink data cable. Do the following steps in this order:
1) You will need to sleeve the end of the data cable that goes into the Starlink dish through the bottom port of the ground mount and out the top of it.
2) Then continue to pass it through the base of the mast so that it comes out the top of it. With the data cable through the base mount and mast, carefully sleeve the mast down into the base mount while being sure not to kink or damage the data cable in any way. If you have the base mount and opted for the Ease-of-use tilt, this is when it really comes in handy. You would remove the “T-Bolt” from the tilt unit and lay the mast on a step ladder, chair, etc. This way you can do the remainder of the work to mount the Starlink dish while on the ground and not standing up on a ladder.
3) Sleeve the data cable through the Starlink adapter so that the data cable comes through the other side with plenty of slack. You will need to extend the top section of your mast approximately 2 feet
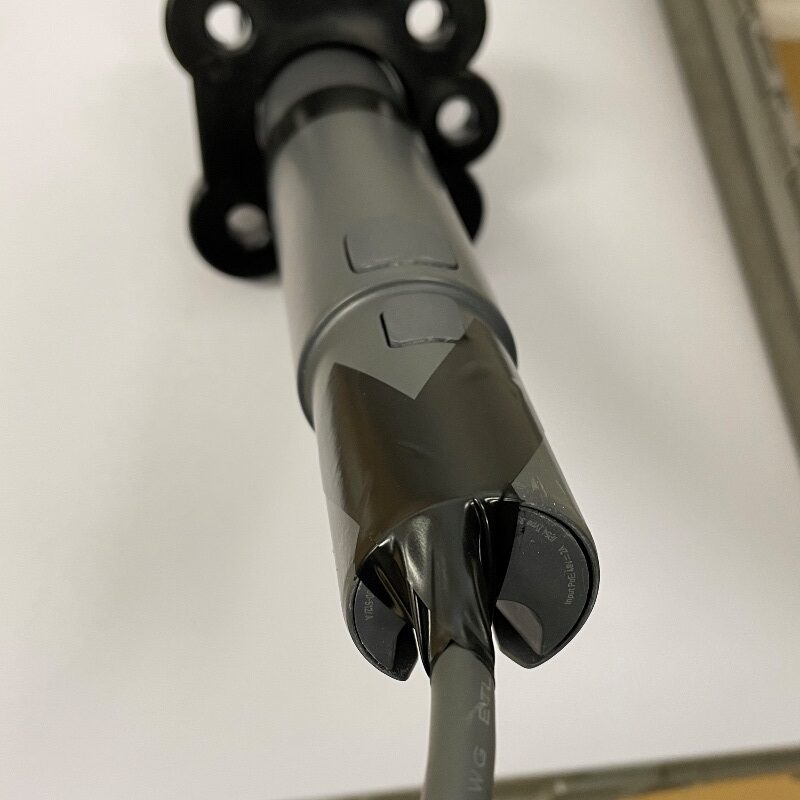
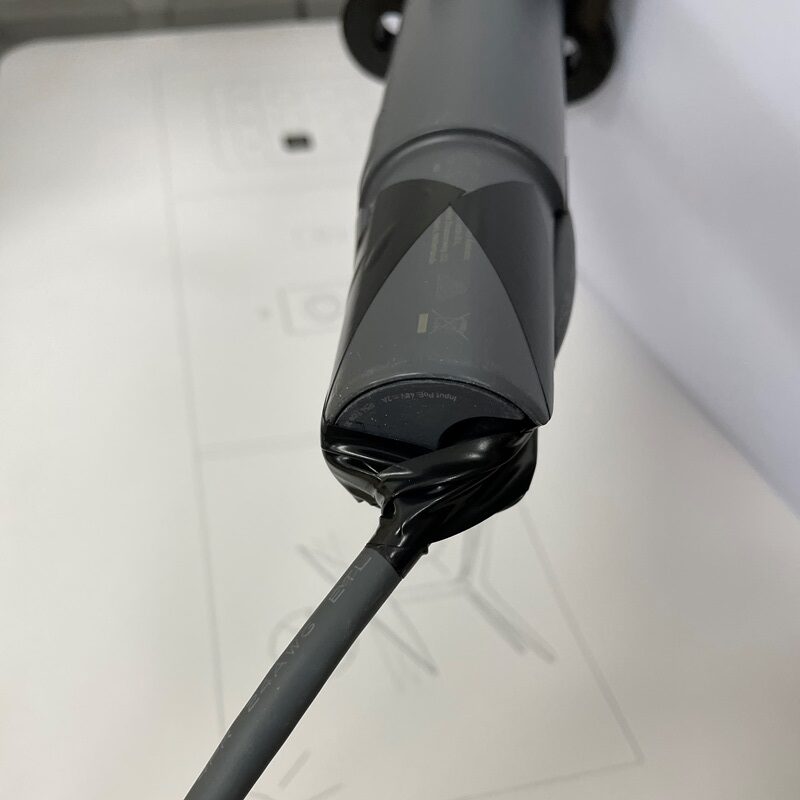
4) Plug the data cable into the Starlink dish. At this point, you will need some very sticky tape. We are going to take an extra step in helping secure the data cable inside its receptacle so when we are raising the mast, the data cable is much less likely to come loose. We will make 2 or more wraps down the tapered portion of the Starlink dish shaft back up and around the data cable and attach it back to the tapered portion. See pictures below:
5) Sleeve the Starlink adapter on to the shaft of the Starlink dish. Sleeve the Starlink adapter onto the Starlink dish up to the line we made earlier which should be about 5.25 inches. Clamp down the lever clamp onto the Starlink dish.
6) Take the Starlink dish and adapter assembly and carefully place it into the top tube of the mast. Do not let it fall uncontrolled onto the section below, as the top tube of the mast needs to gently rest on the bottom of the Starlink dish. We don’t want to damage the Starlink dish.
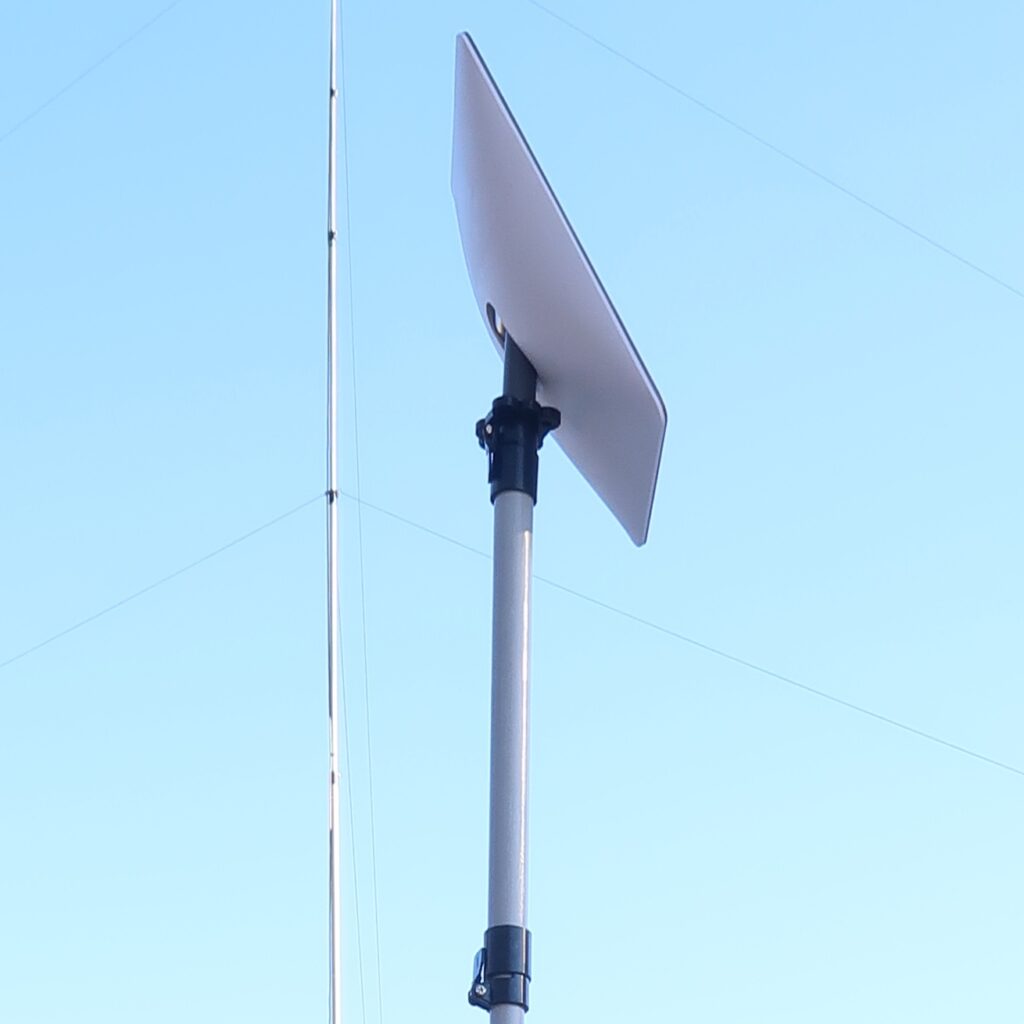
Finished Assembly
At this point the top of your mast should look like the picture below. The data cable should be completely ran through the length of the mast assembly and the dish should be locked in place and ready to go up.
Guying
Once the mast is ready to go, this is the best time to measure out your guy line lengths. See the guying diagram up above. Those lengths are for guying on flat ground. The lengths may need to be longer on a lower slope or shorter on a higher slope of the ground guy point in relation to the mast.
Once the guy lines are cut, tie them on the guy rings very well. Using at least a triple knot to be sure they do not go anywhere.
If you are using the Tilt mechanism, raise the mast into the vertical position and reinstall the “T-Bolt”.
This is now your last chance to move the base of the mast to its final location prior to pushing the mast up.
If using the GK-MXSB-4 (or 3) Maximum Stability Guy Kit, tie the guy lines to the bottom guy ring and secure them to the additional guy stakes using the Guy Tensioners as shown in the drawing. The Guy Tensioners make guying the mast much easier as you do not need to be a knot tying expert. Make sure that the mast is perfectly level at this point as it is very easy to adjust using the guy tensioners.
Pushing-Up the Mast
This is where having help comes in handy. If you have or four friends or family members that can help hold the guy lines and set the guy tensioners at the respective guy stakes this makes erecting the mast easier and safer. While one person opens a locking lever of the mast clamps, each person on the guys can hold the guy lines for their direction and give slack or take up the slack in the lines as the mast goes up. When the mast is fully pushed up secure the guy lines in the guy tensioners on the guy stakes. With one person standing at the base of the mast looking up directing the people on the guy lines to loosen or tighten their guy line. Continue this until the mast is vertical.
Complete!
Follow the instructions from Starlink to initialize your dish and you should be up and running in no time.