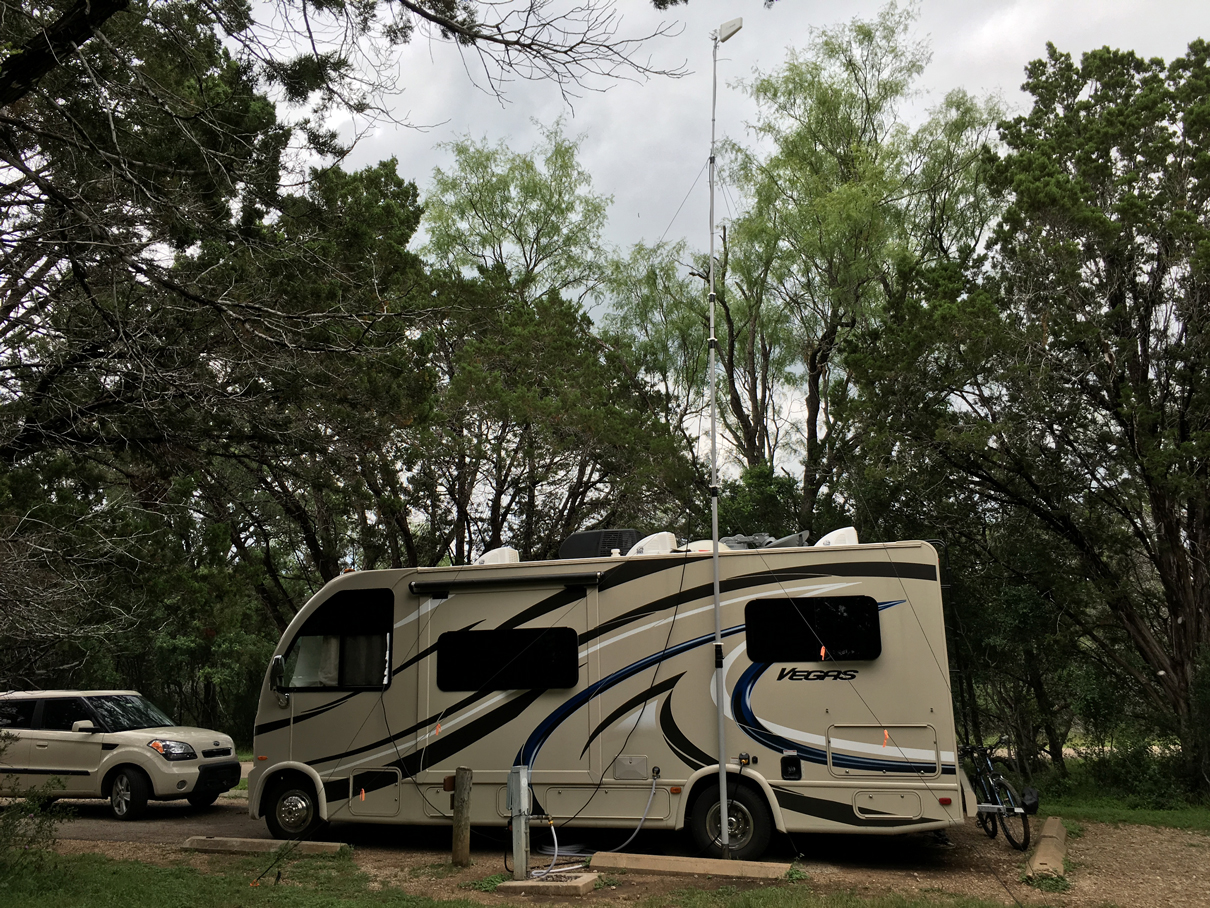
Starlink requires a clear view of the sky in a wide arc to have an uninterrupted satellite signal. Many homes, campsites and workplaces don’t have an easily accessible location to mount a Starlink dish with this wide arc of unobstructed sky. Scenarios like this are where a push-up mast can be utilized to get elevated above these obstructions. A fiberglass mast is the best way to go as the feed line can go through the center of the mast and not add to an already high lightning target or be routed outside the mast for ease of installation. The mast is completely non-conductive and will help add to the longevity of the Starlink setup. Further down we will talk about what you would need to get this done. Let’s get into it.
Verify which Starlink Dish you have:
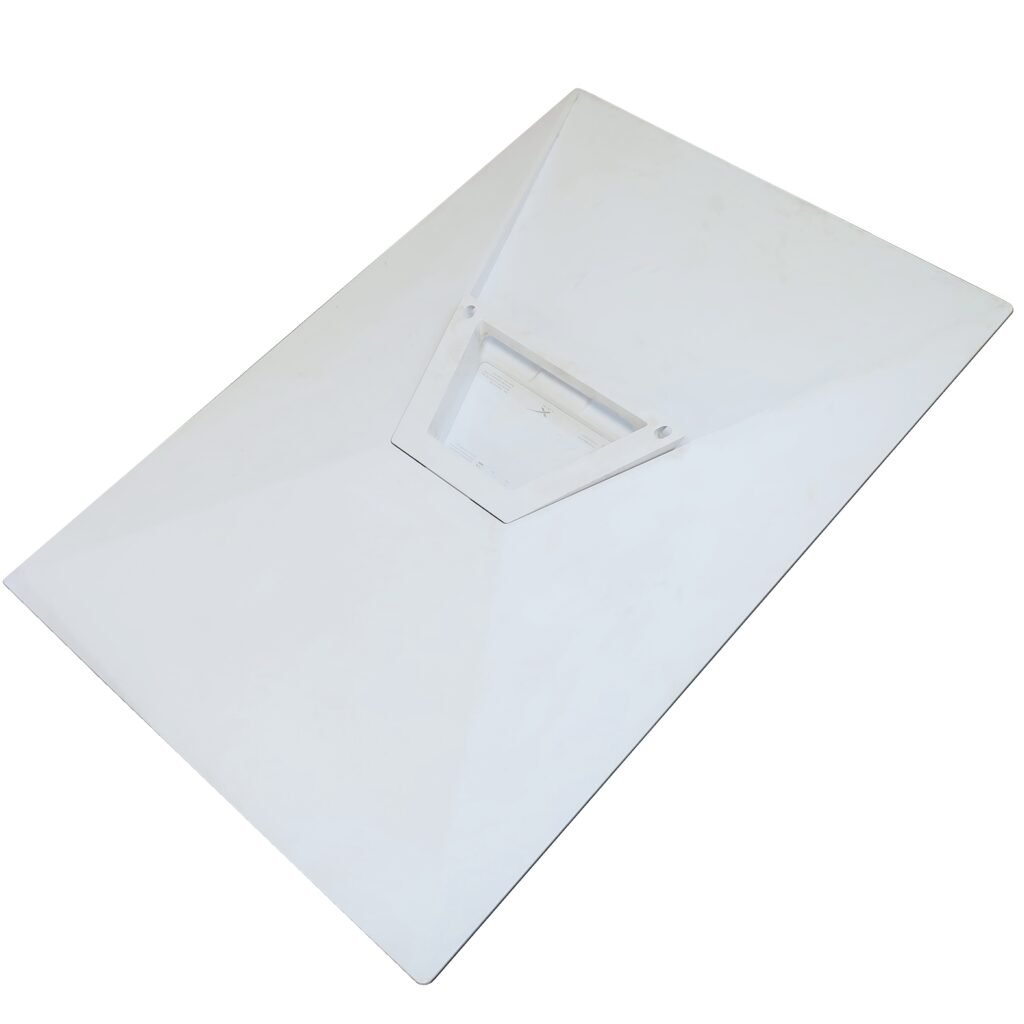
This article is for the installation of a Gen3 Starlink dish on to our Ultra Heavy Series of fiberglass push up masts. The Gen3 Starlink Dish is supplied with a “kick stand” on the bottom for the user to place on the ground.
If you have a Gen2 Starlink Dish, see our latest article: How to install Starlink Gen2 on a mast. The Starlink Gen2 dish has a 1.5 inch OD round shaft coming out of the bottom of it. See what the dish looks like below:
End Result Drawing and Diagram of Gen3 Dish
Look below to see the diagram of a completed full setup. Some items are certainly optional depending on the setup, but the below setup is complete for a ground-based system where you do not have a structure nearby or on top of a structure.
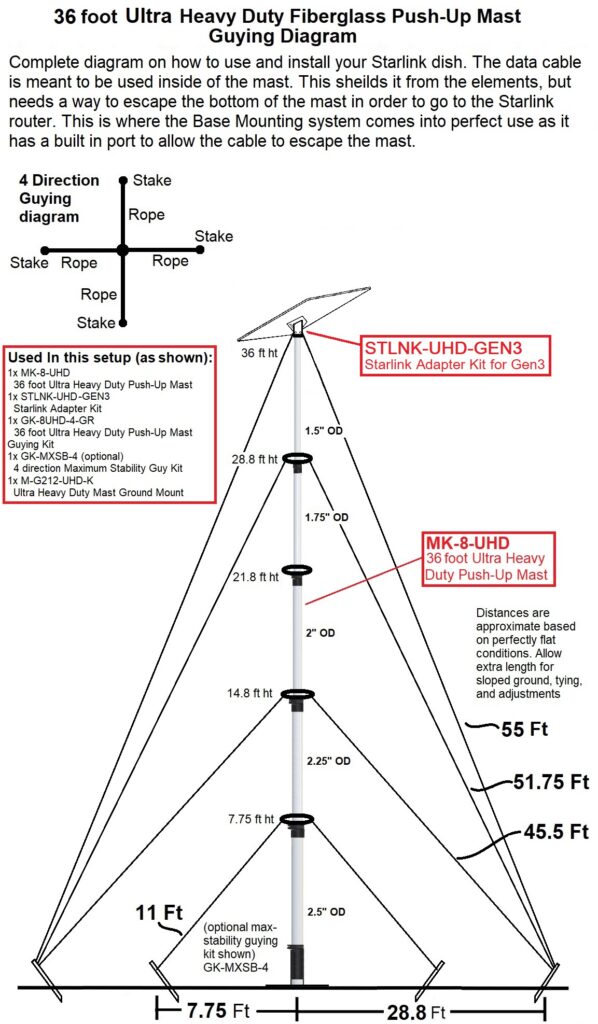
Here is a complete list as shown above:
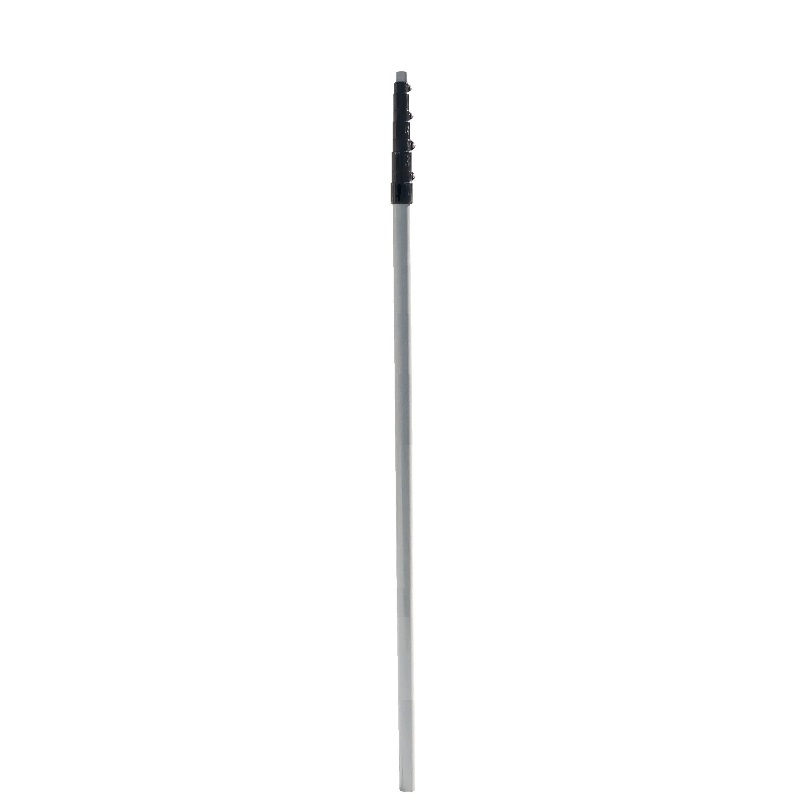

1x MK-8-UHD, 36 foot Ultra Heavy Duty Fiberglass Push-Up Mast
1x STLNK-UHD-GEN3, Starlink Adapter Kit
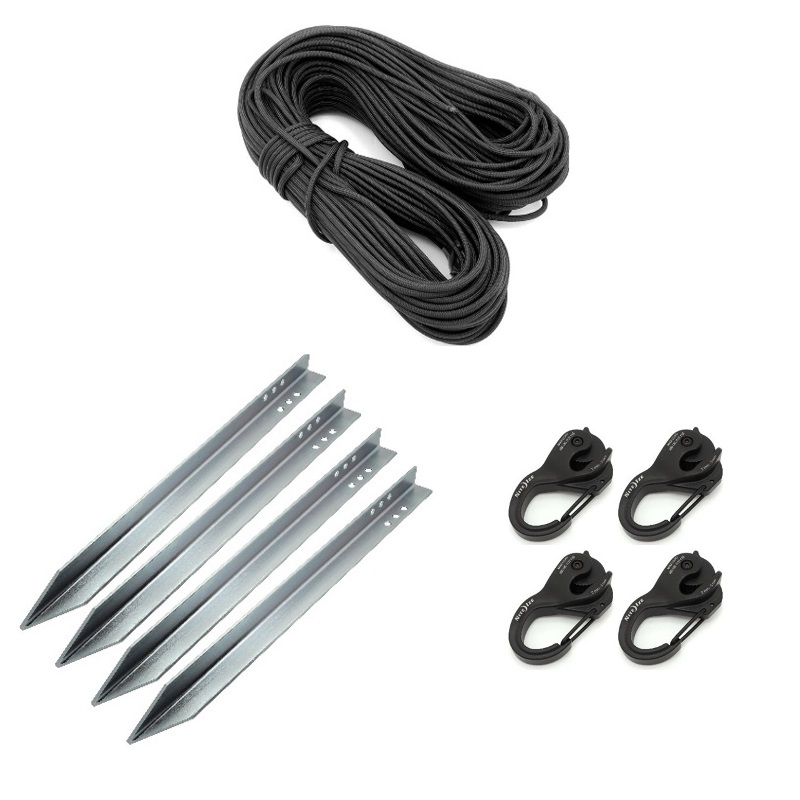
1x GK-8UHD-4-GR, Guying Kit for the 36 foot UHD Mast
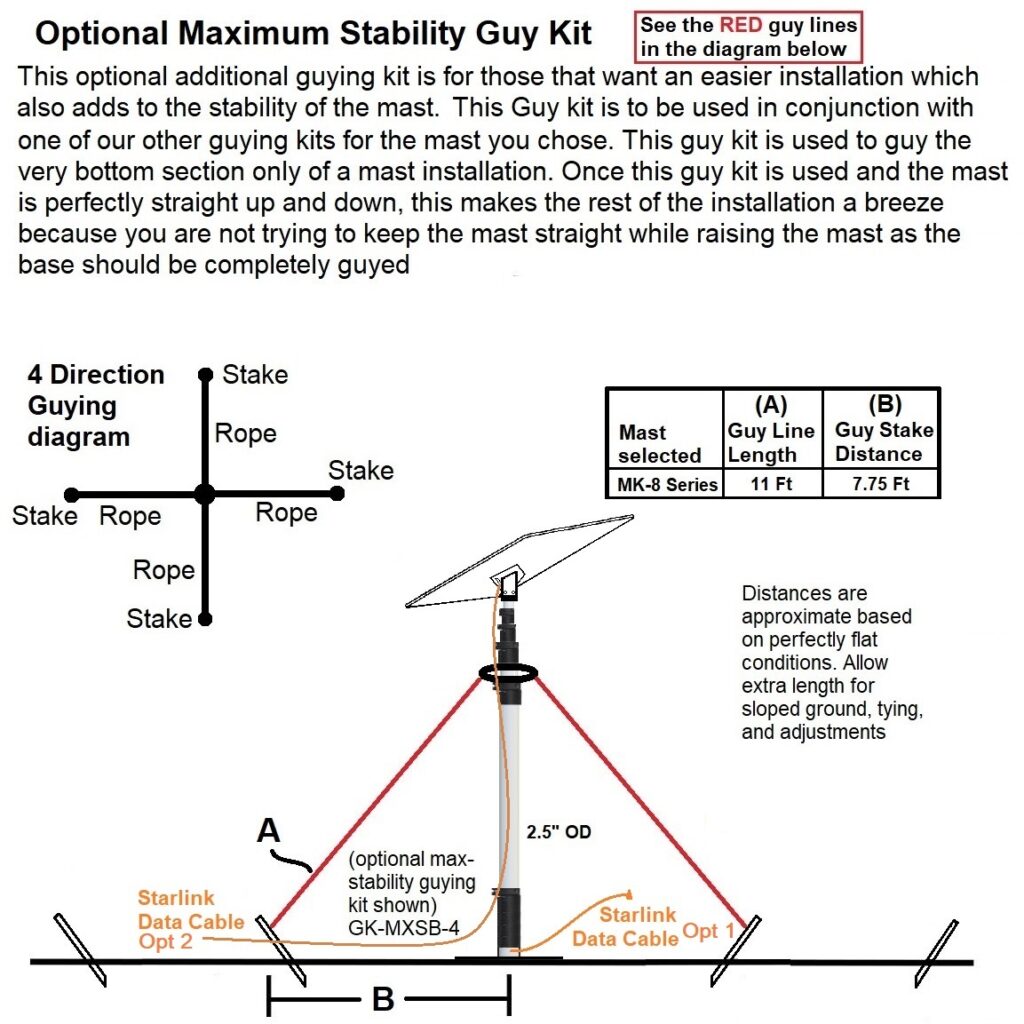
1x GK-MXSB-4, Maximum Stability Guying Kit (optional)
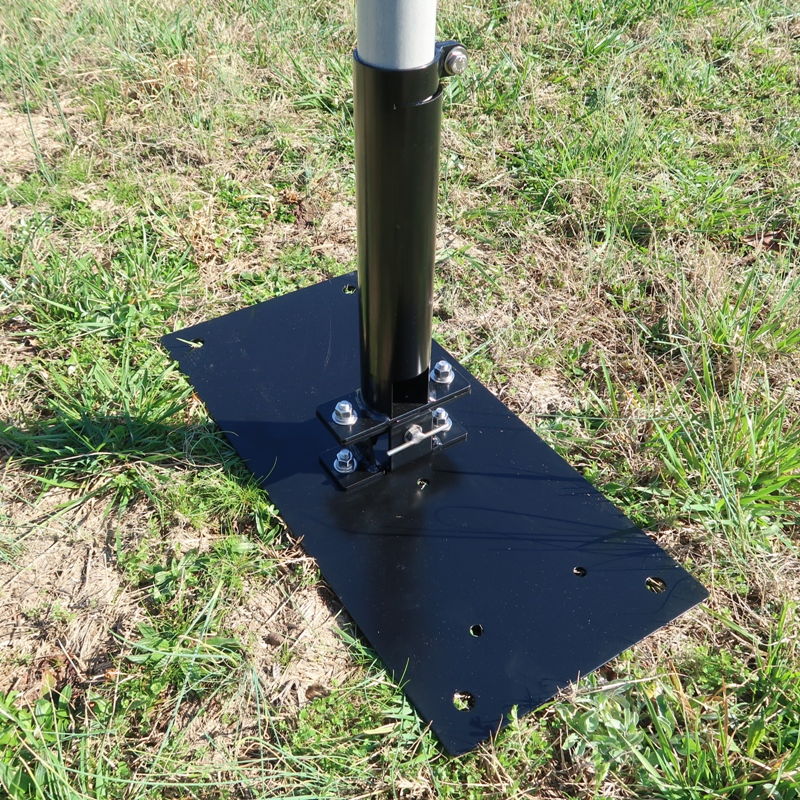
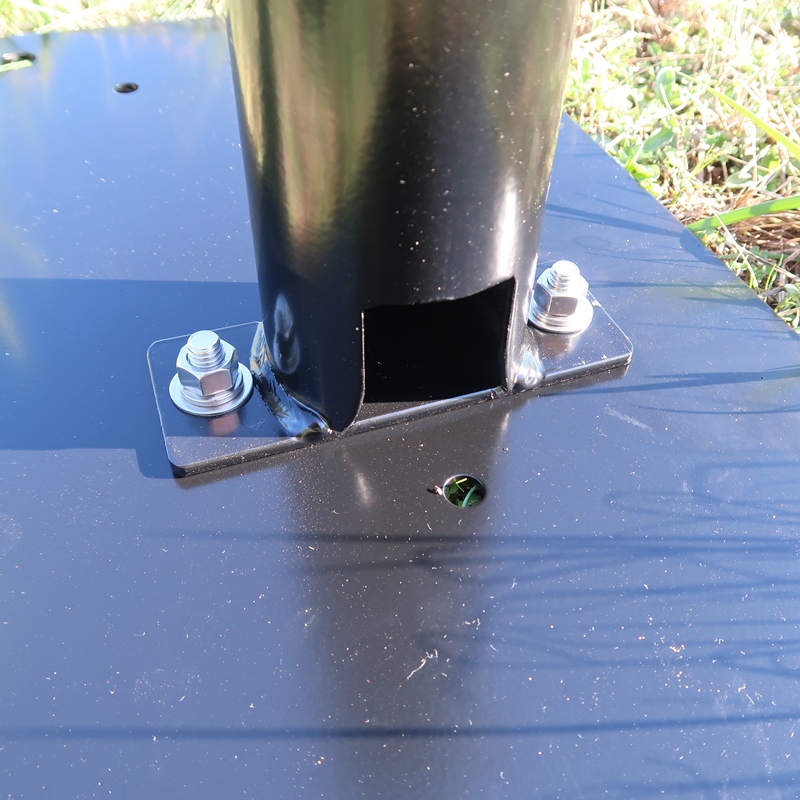
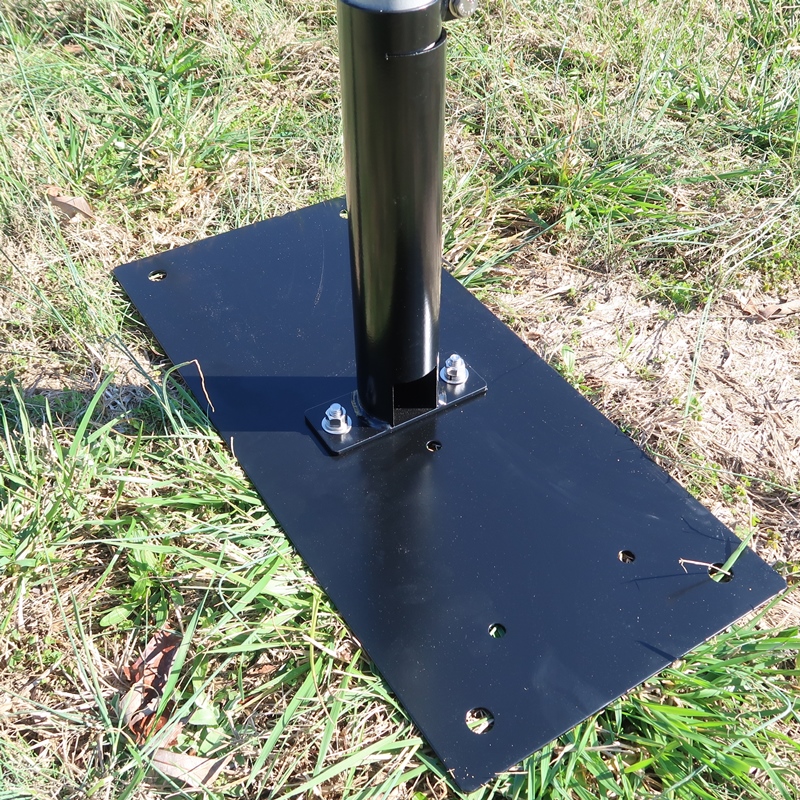
1x M-G212-UHD-K, Ground Mount Base Kit (optional)
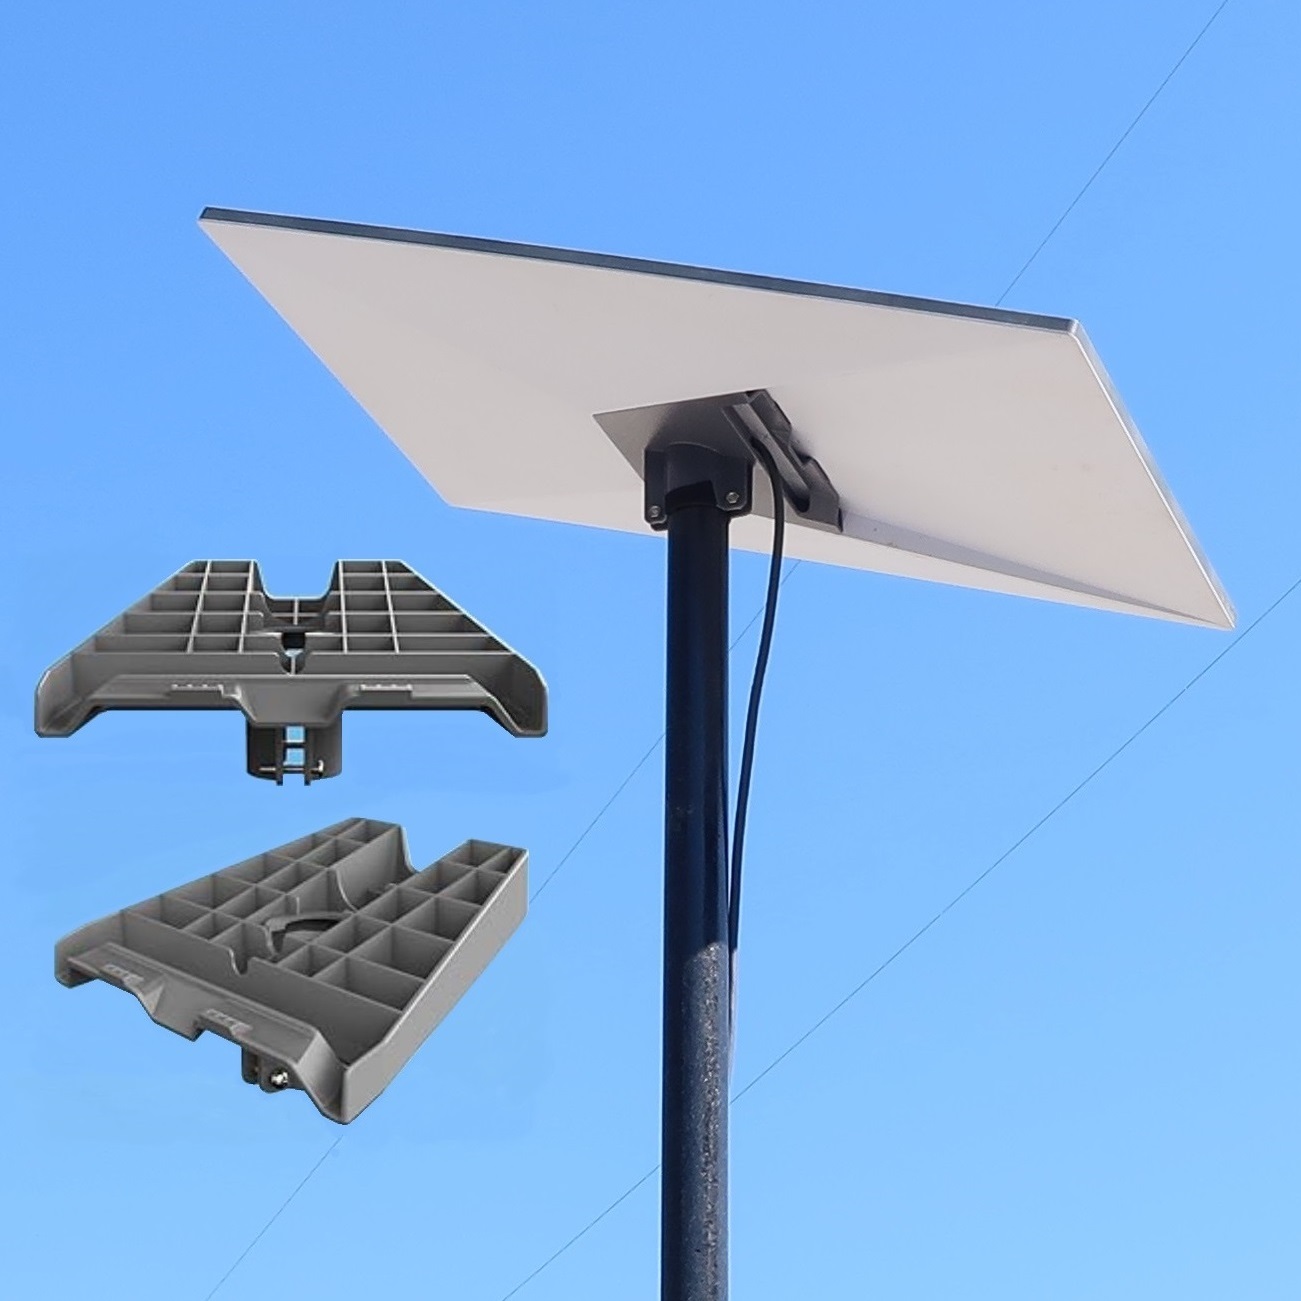
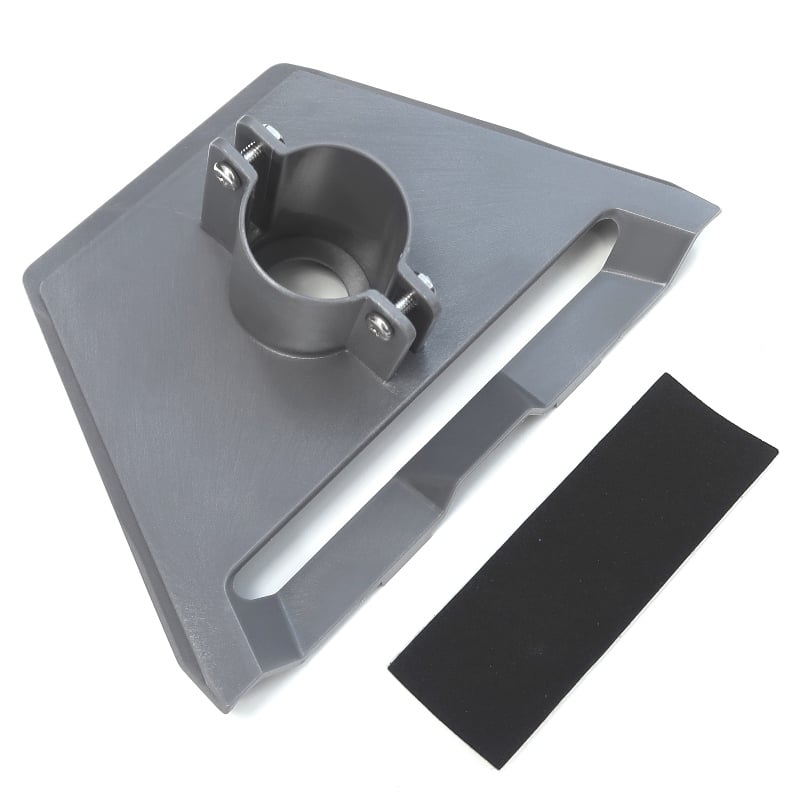
Getting Started – Starlink Gen3 Adapter Usage
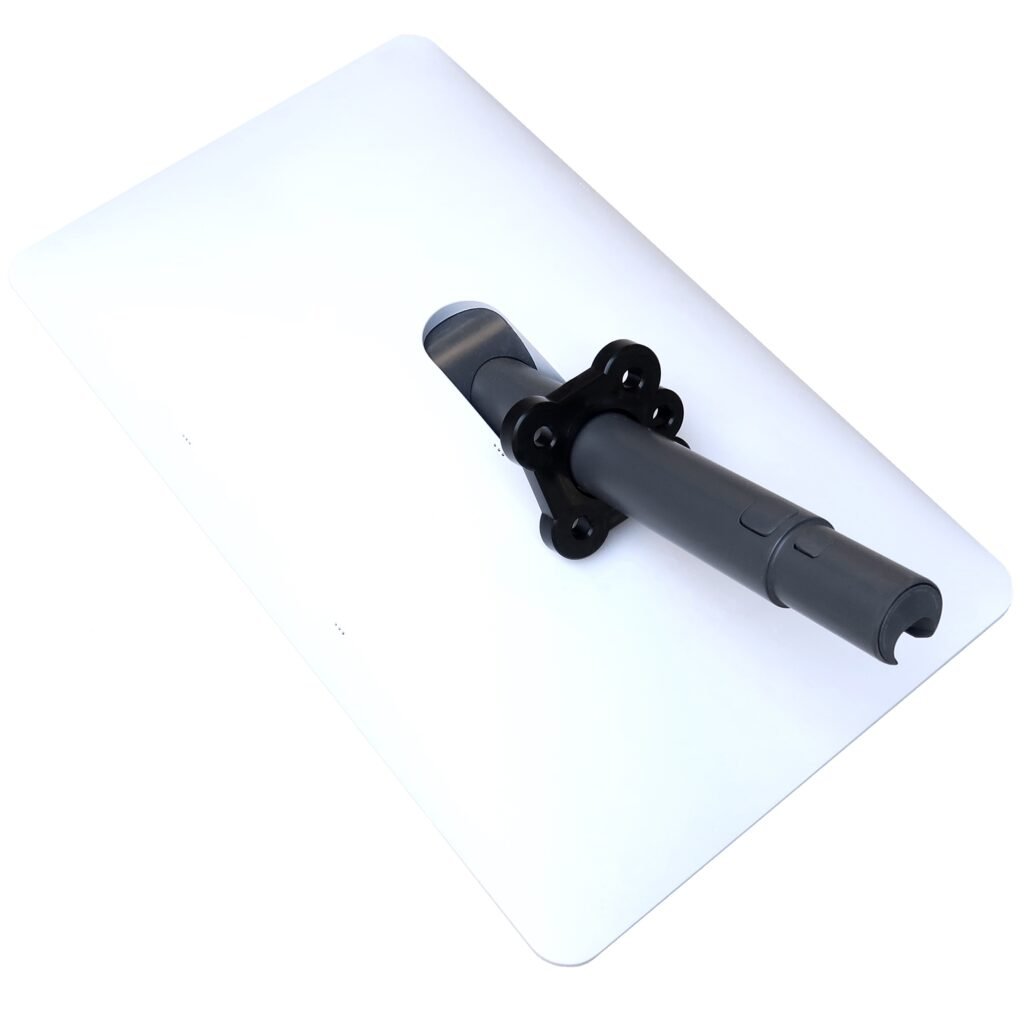
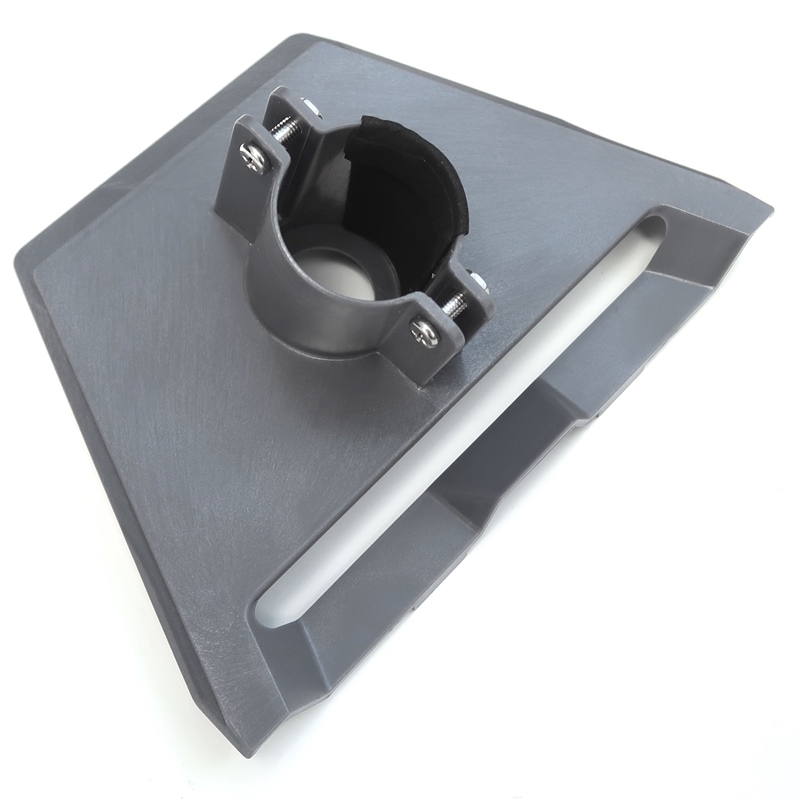
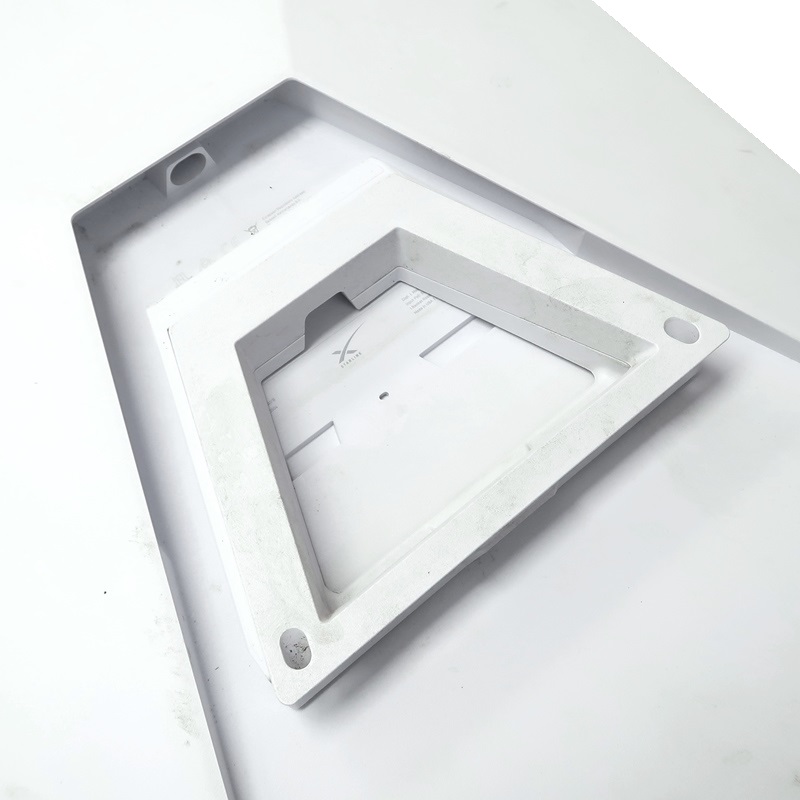
The Starlink Gen3 to UHD mast Adapter Kit, is almost plug and play. Unbox it, apply the grip sticker to the inside of one of the halves of the pole adapter, and you are ready to apply it to the tubing.

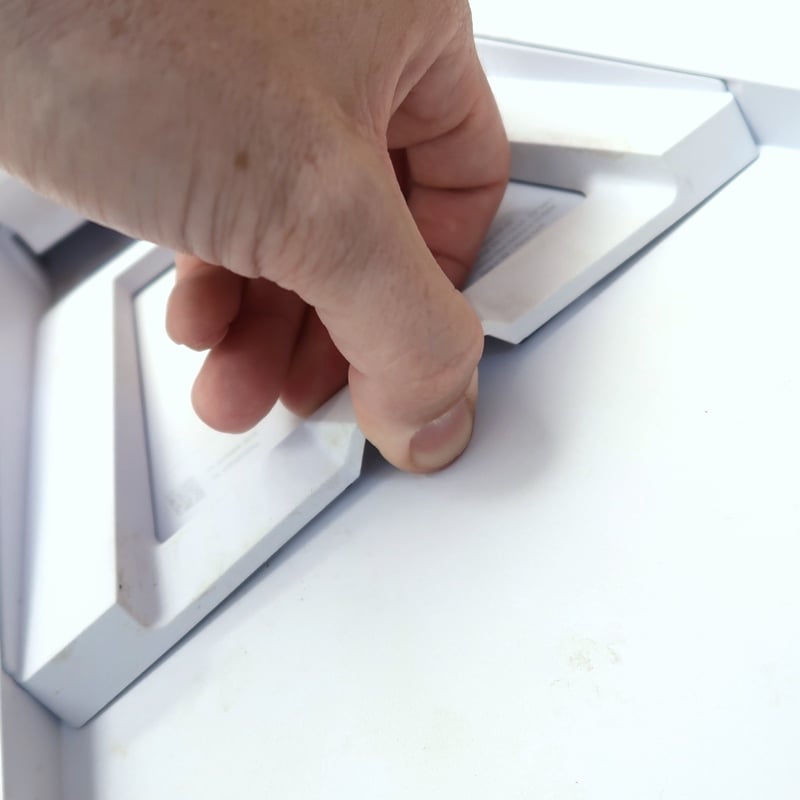
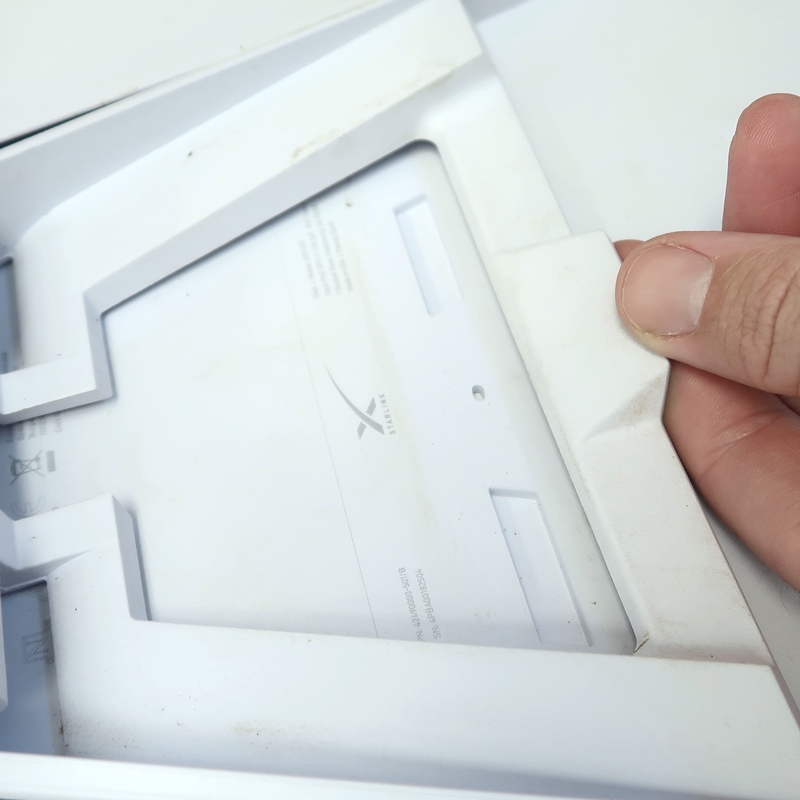
We need to prep the Starlink Gen3 Dish to receive the Starlink Gen3 Adapter by removing the “kickstand” from the bottom of the dish. Pull up on the tab from under the kickstand to release the two retaining tabs from the back of the dish, simultaneously sliding the entire kick stand assembly away from the data port in the dish. The kickstand assembly should now we entirely removed.
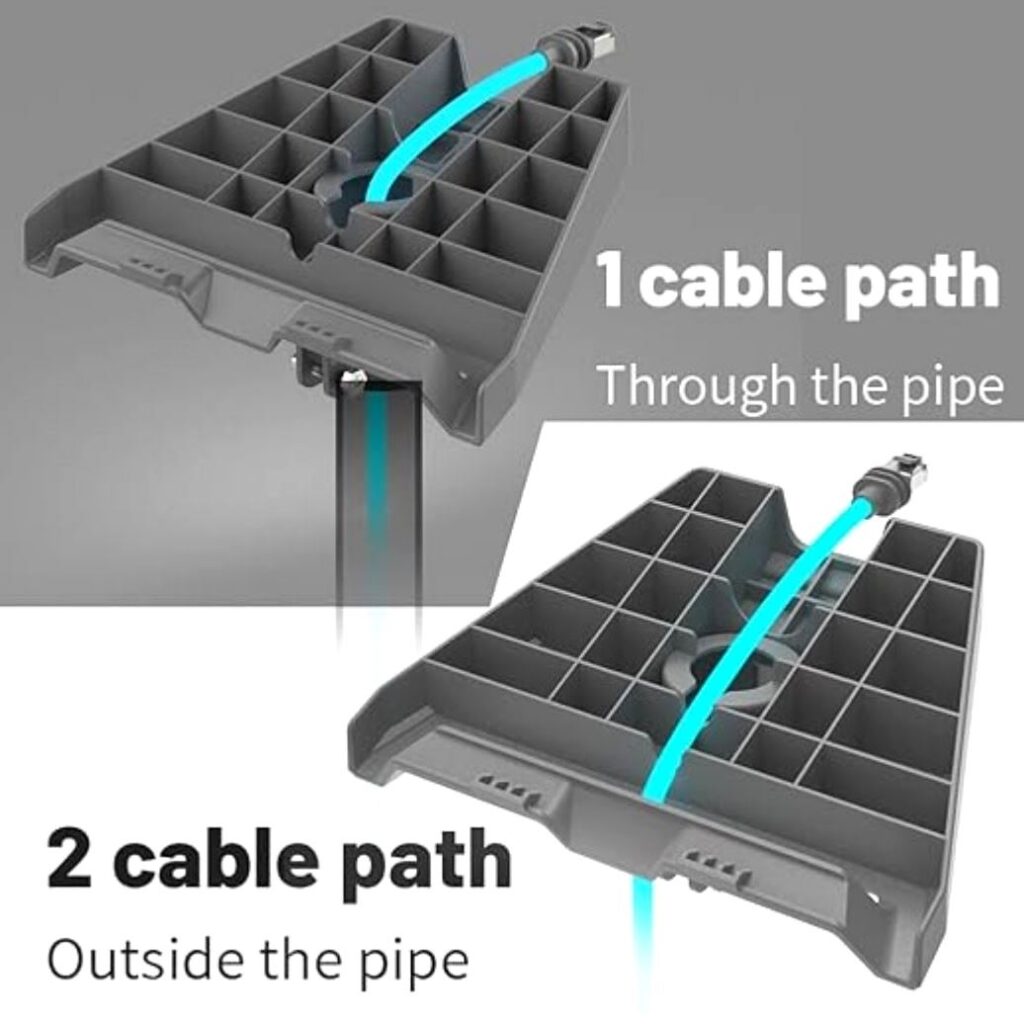
The Starlink Gen3 adapter has two methods for routing the data cable. Cable Path 1 can be routed through the center of the mast for a clean look and also protecting the data cable from UV and other elements. Cable Path 2 can be routed outside the mast for faster, more repeated, more simple installations.
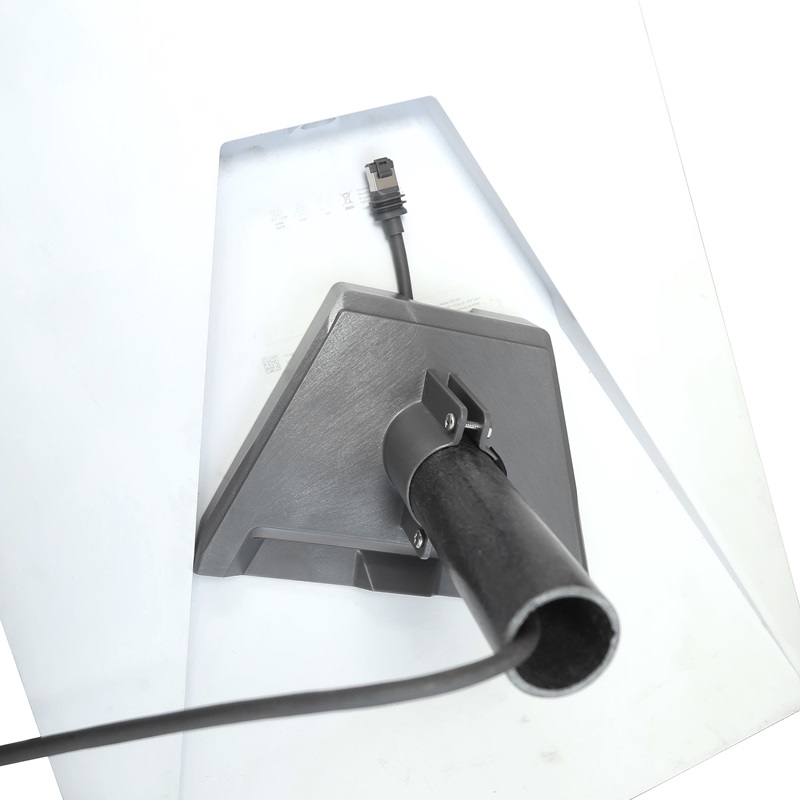
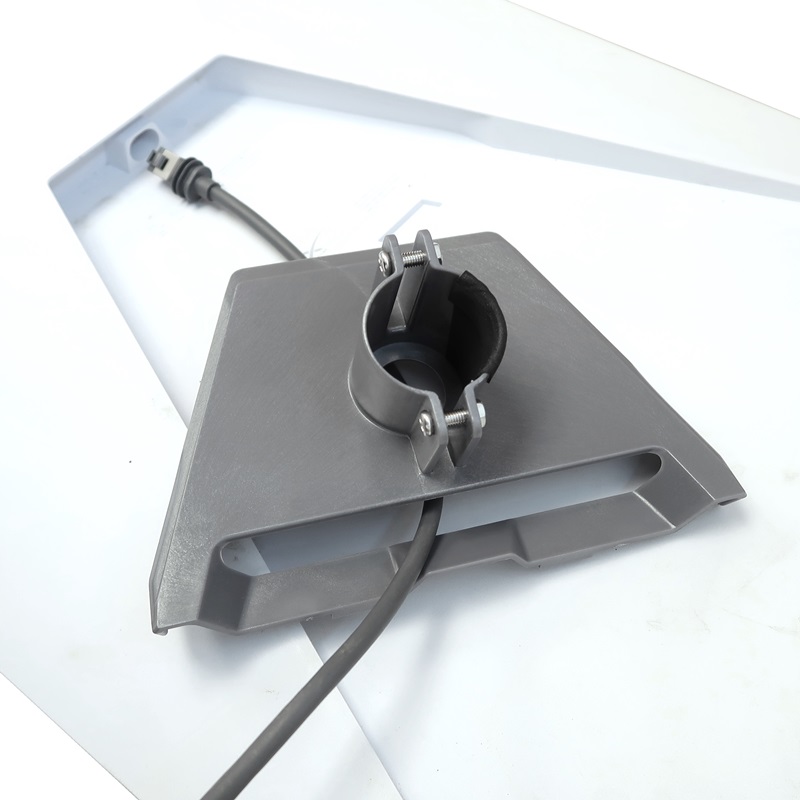
Once assembled, click in the data cable into the data port in the dish then slide and snap the Starlink Gen3 Adapter into the Gen3 Starlink dish.
Assemble on a Ultra Heavy Duty “UHD” Mast
The Following guide goes into further detail of installing the Starlink Gen3 Adapter onto a UHD Push-up Mast:
The MK-8-UHD mast and the STLNK-UHD-GEN3 gen3 adapter fit and work perftly together and will require a little assembly. For the mast, see this Assembly Article for the quick assembly instructions. Once the Mast Clamps are installed onto the tubes of the mast and assembled, you are ready to put the tube sections together. Be sure to have the guy ring set that would have come with the Guying Kit close by. This is the ideal point where you would sleeve them between the mast sections.
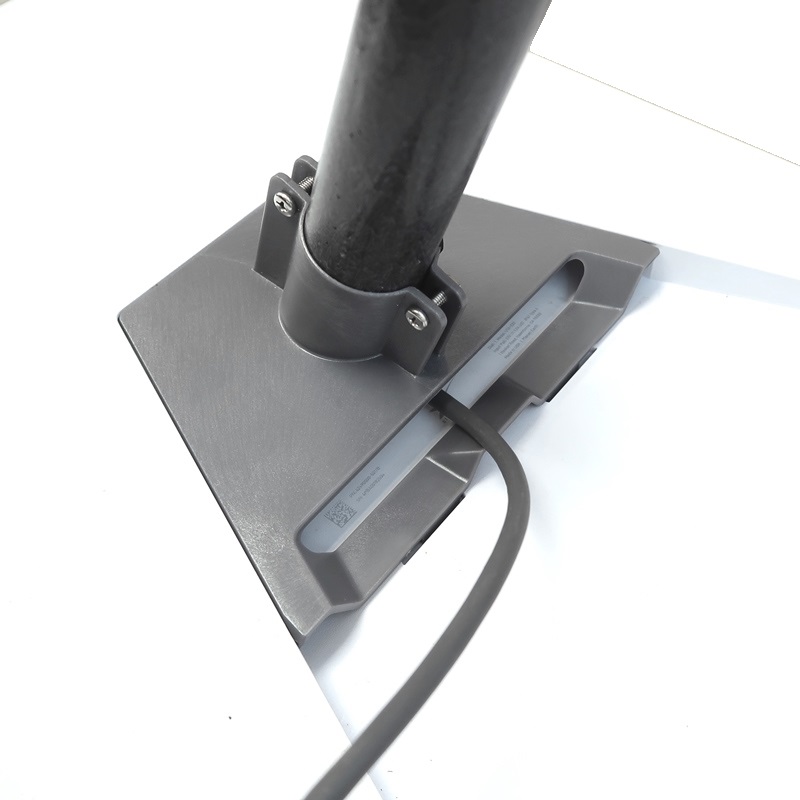
If you decide to go with cable path 2, we will need to sleeve the data cable through the mast. This is where the Ground Mount Kit will come in handy. It has a built-in port at the base for the data cable to go through and up the mast. Otherwise, you would have to fashion something that would have this capability.
When you have the dish on the mast and the mast in the mount, you can attach any guy lines to the guy rings at this point if needed. Some quick installations wont need guy lines, but in order to get over most obstructions, you will need at least one set of guys. Believe it or not, but even the lightweight Starlink Gen3 dish on the end of a long lever arm, like a push up mast, in the light breeze will apply thousands of pounds of horizontal force onto the base. Be sure your base is ROCK SOLID and cannot move.
Guying Basics:
In most setups a least one set of guy line will be needed as the base can only support so much horizontal movement with such a long lever arm, being the mast, sticking out of the top. Each “SET” of guy lines represents each vertical point along the mast. If most setup might require one “SET” of guy lines, the top guy ring, with 3-WAY or 4-WAY guy ropes could be utilized to stabilize the mast.
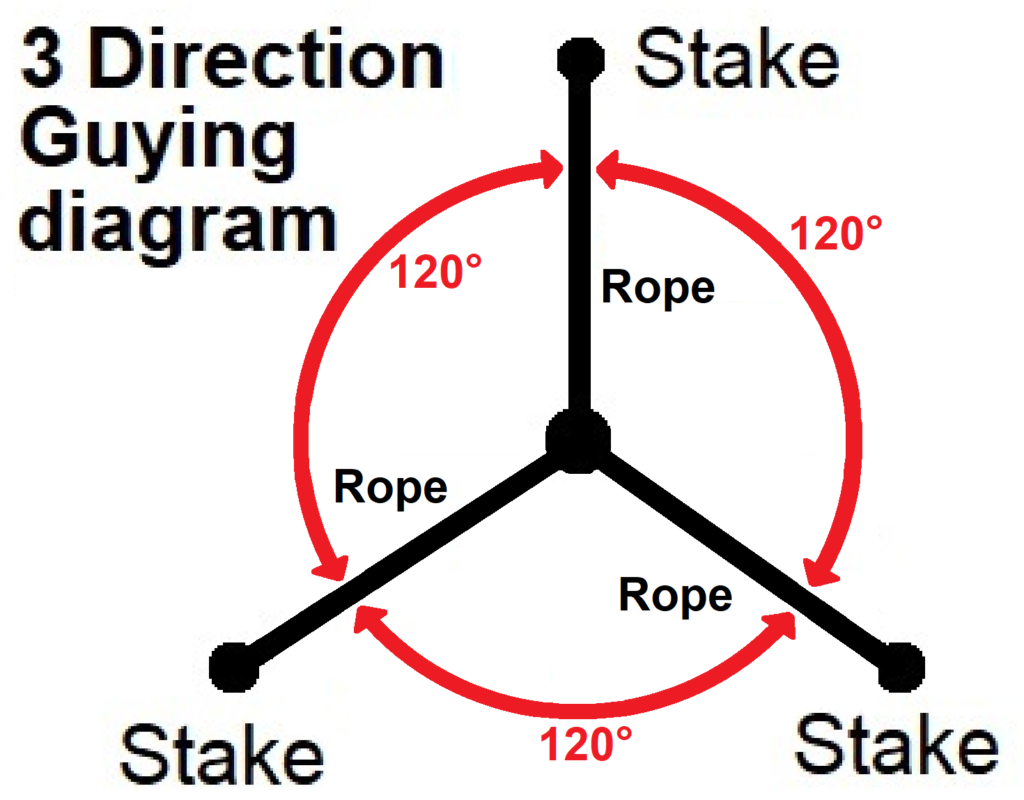

See the guying diagram toward the beginning of this post for guy line length and distance for the guy stakes to be placed from the mast.
Setting the Mast Vertical Using Optional Stability Guy Kit:
Putting it all together:
The mast should be in the vertical orientation by now. The data cable should be run. All that should need to happen is raising the mast sections starting with the smallest tube first. If possible, having some extra people on hand to assist with the guy ropes will make things FAR easier and safer. When erecting the mast with the dish on top, raise it slowly in order to keep an eye on any sway you might see in the mast. Depending on the conditions, the additional hands of friends would come in handy to assist in holding the guy lines while someone pushes the mast up. The people holding the guy lines can then attach the guy lines to the guy stakes, or some other fixed guy point, and take the slack out of the lines once attached.
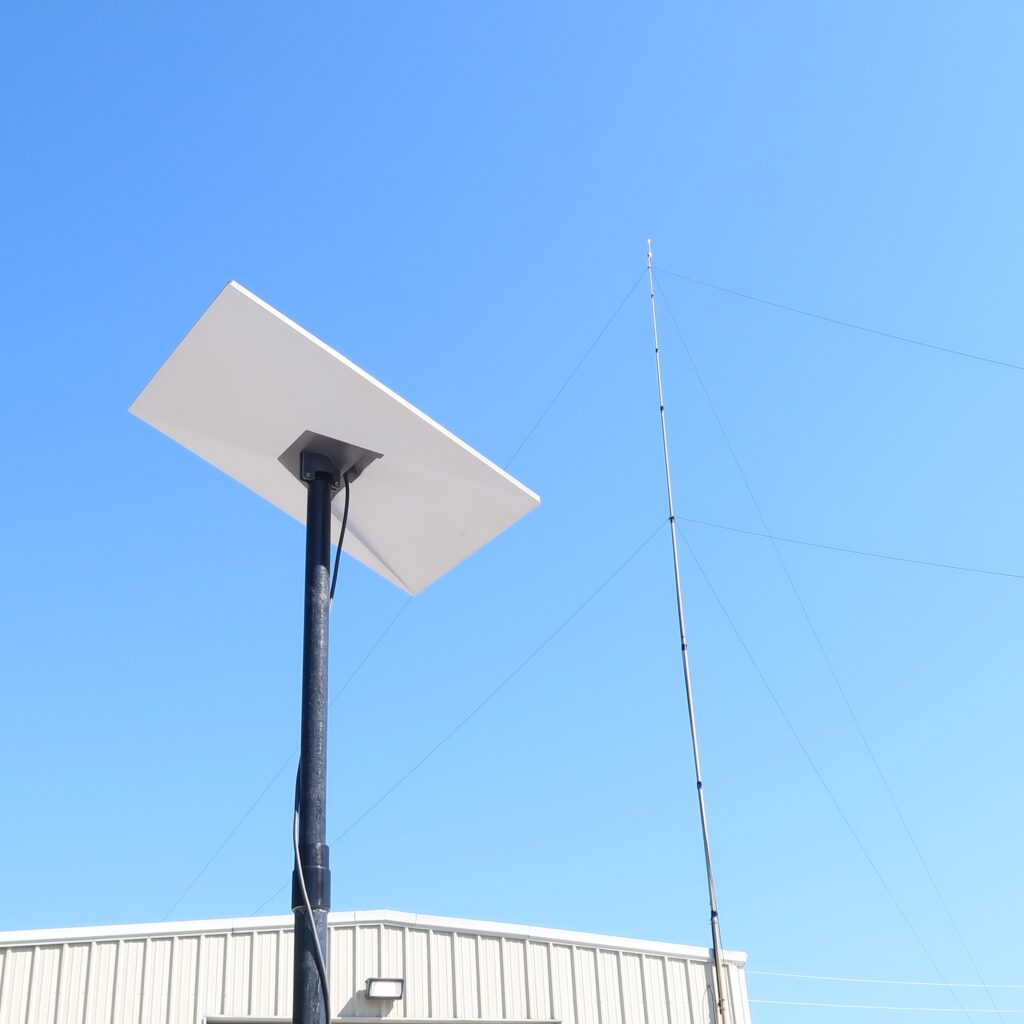
Finished Assembly
At this point the top of your mast should look like the picture below. The data cable should be completely ran through the length of the mast assembly (if you chose to use cable path 1) and the dish should be locked in place and ready to go up.
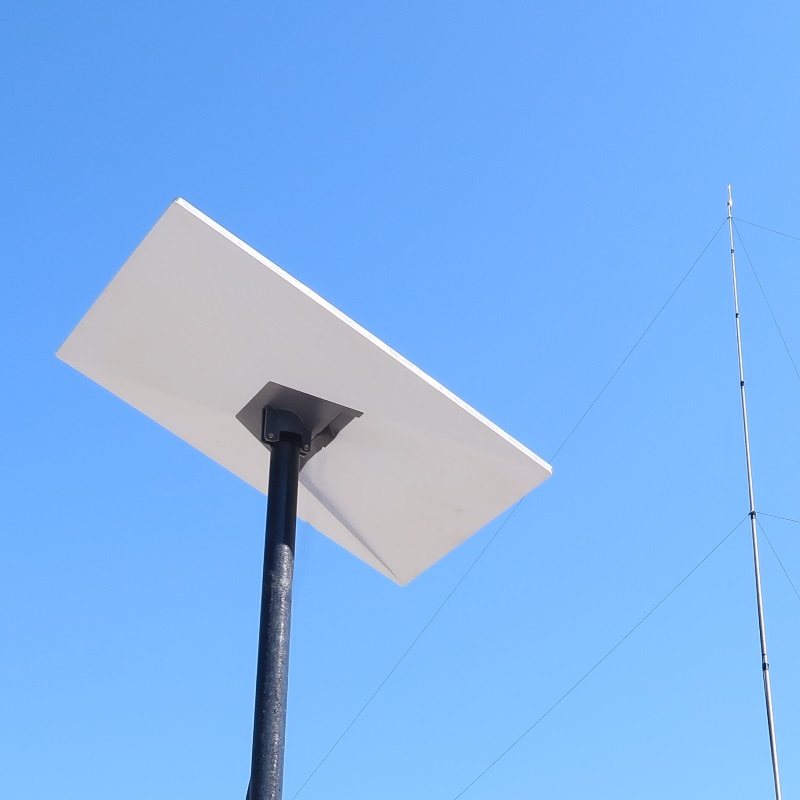
Complete!
Follow the instructions from Starlink to initialize your dish and you should be up and running in no time.