Mast Mount “GO ALL OUT” Combo
They are finally here! Our customer’s have been asking for mounting systems for our Masts for years. After going through many different designs we have developed the most capable mounting system for use with our Masts. These Mast Mount “GO ALL OUT” Combos include all you would need to mount your mast in ANY situation.
Features:
Support Tube Polymer “Anti-Friction” Bearing – Polymer low friction bearing on an internal shelf allows for hand rotation of your mast when support tube clamp is loosened.
Support Tube Coax / Cable Port – Port, located at the base of the support tubes, allows for Coax and Cables to be fed up through the mast protecting the Coax or Cable and allowing for a very clean looking install.
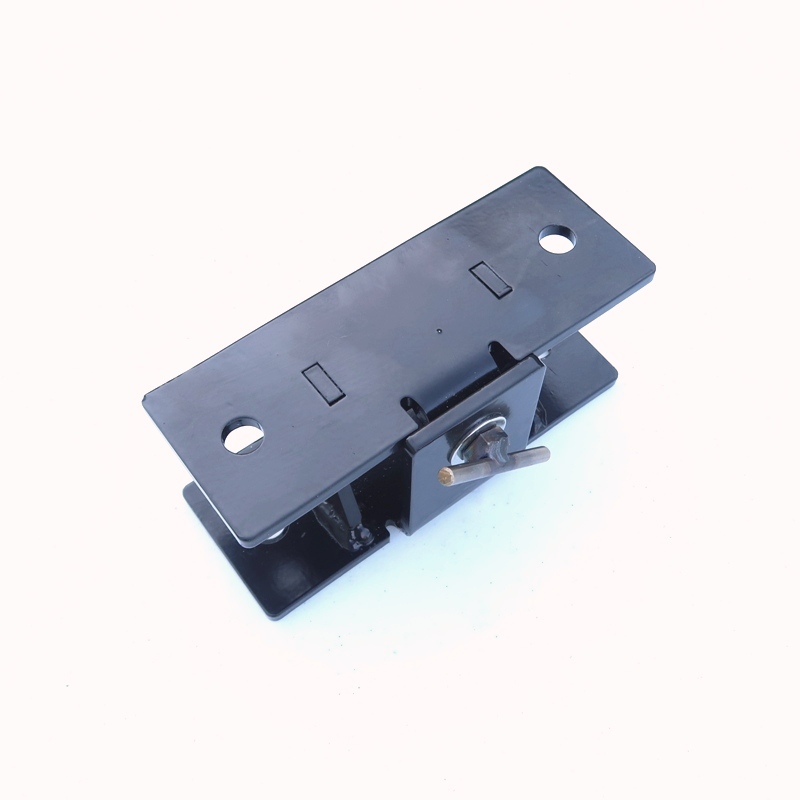
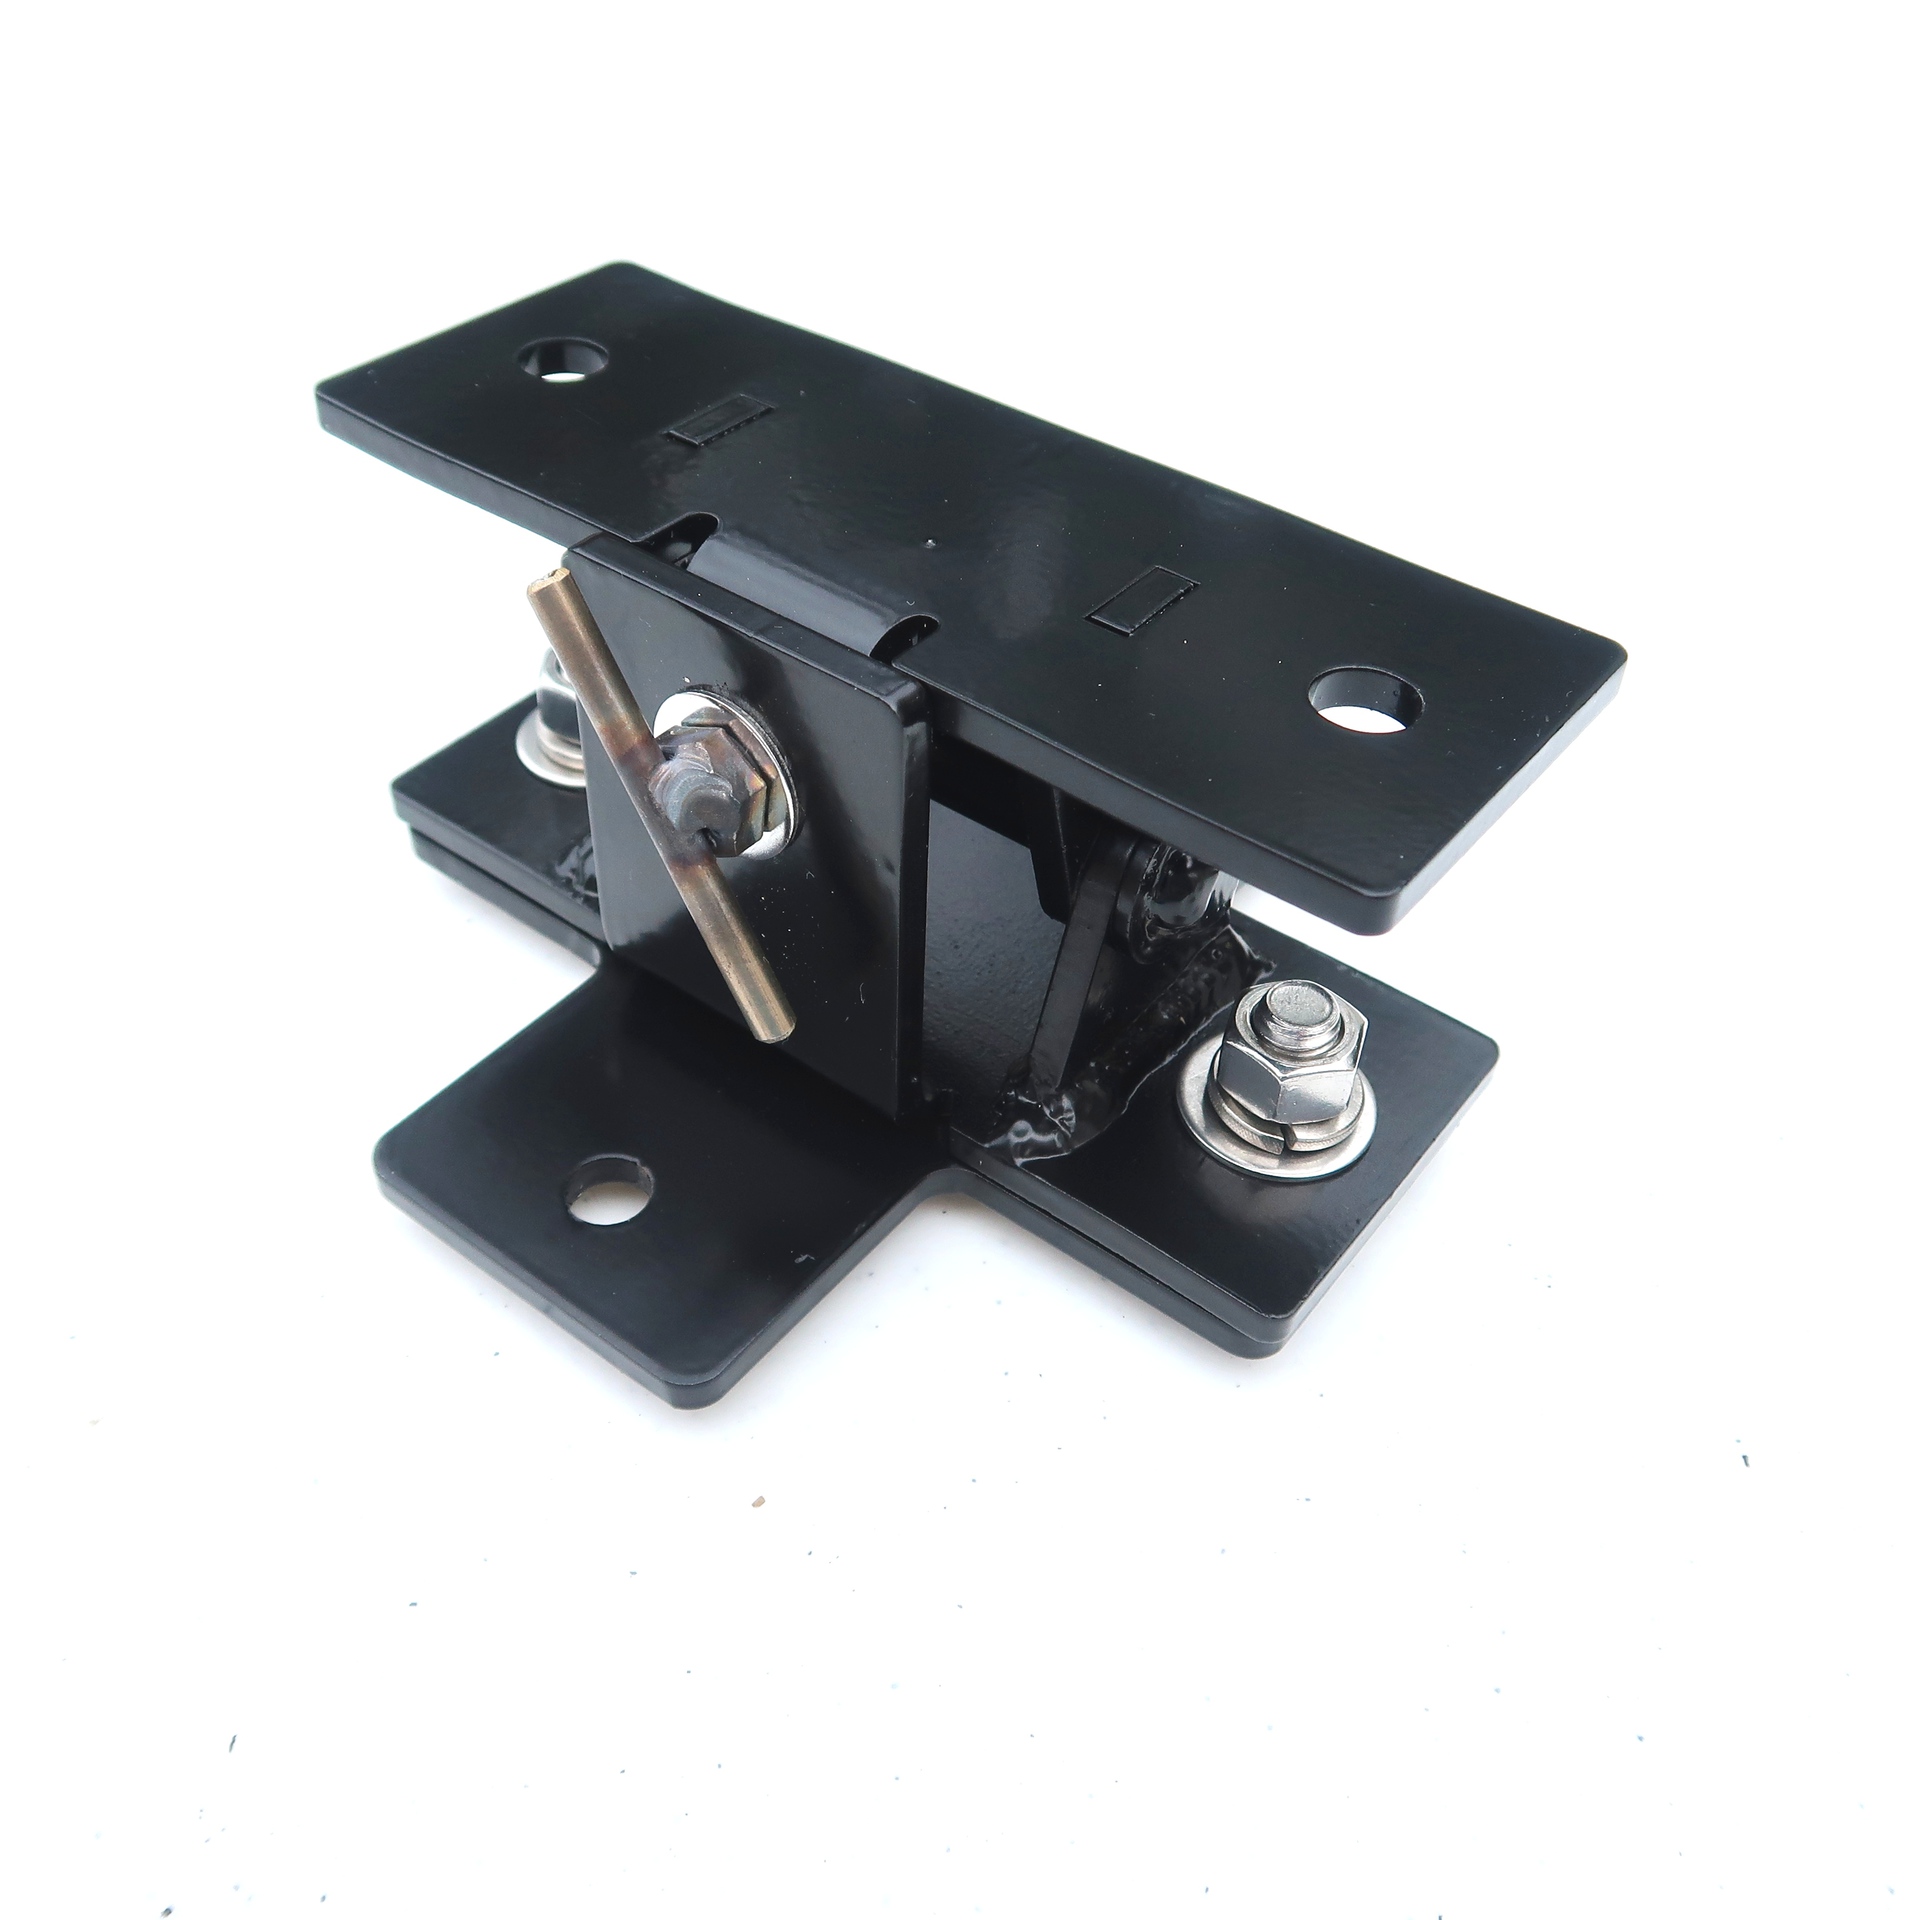
Support Tube and Tilt Mechanism – Precision welds and made from as few pieces as possible to increase strength and durability.
Hitch Bar Cross Drilled – These hitch bars are cross drilled, where the hitch bar attaches to the trailer hitch, allowing for rotation of the entire mount assembly for storage to get it out of the way when you are not currently using it.
Steel Construction – These tubes being made from steel makes for no weak points allowing for additional strength.
Laser Cut Slots and Holes – Precision laser cut holes for easy hardware insertion and a perfectly smooth base
Powder Coating – Expertly applied powder coating for maximum durability, life span, and a perfectly smooth finish.
Stainless Steel Hardware – All hardware is stainless steel for longevity
Assembly Instructions
In order to see the assembly instructions to get these components to the required configuration, select the use below:
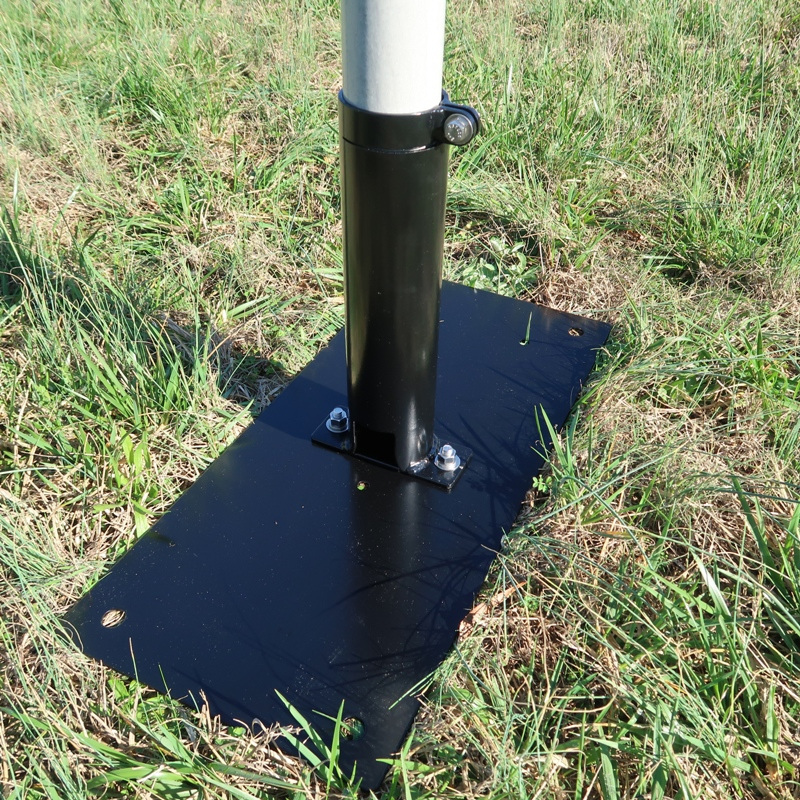
Ground Mount Assembly
The Ground Mount uses the following components:
1x Mast Support Tube
1x Tilt Mechanism (optional)
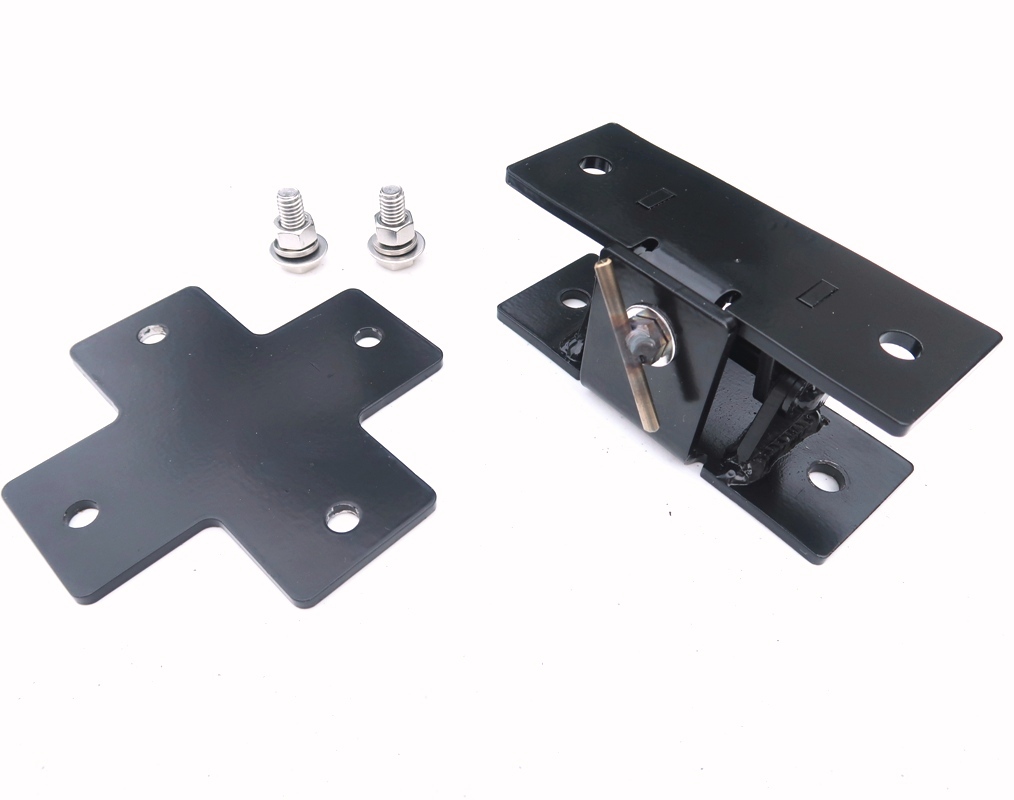
1x 10″ x 22″ Base Plate
4x 3/8″ Stainless Steel Bolts (4x are needed if using the optional Tilt Mechanism, 2x if used with no Tilt Mechanism)
Step 1
(If you did not select the tilt mechanism option, proceed to Step 2)
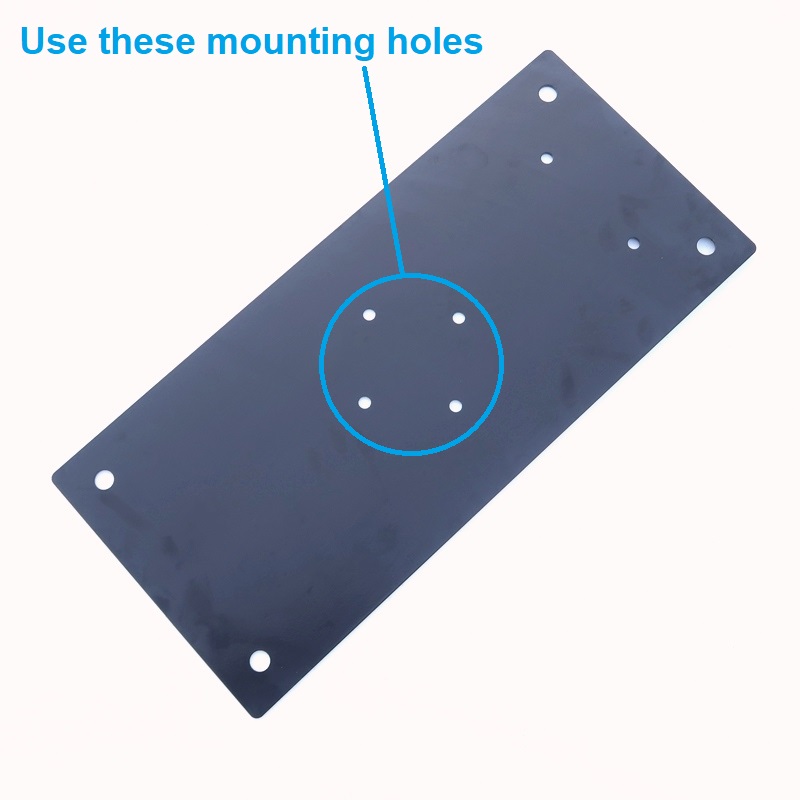
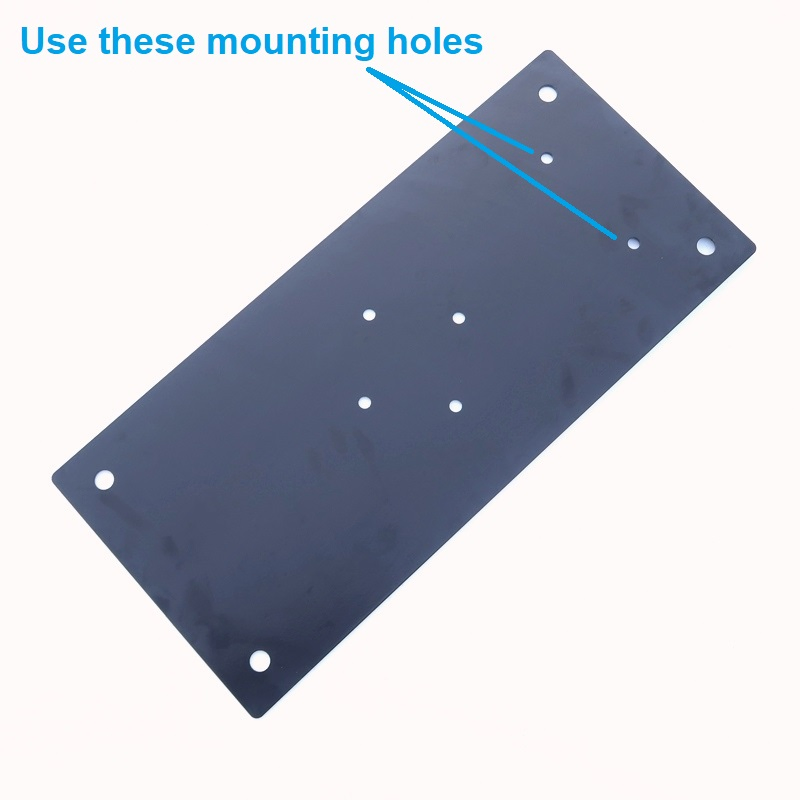
Attach the Tilt mechanism to the Base Plate. Use the holes in the base plate that are located at one end of the 10″ x 22″ base plate.
Step 2
(With Tilt Mechanism)
Attach the Support Tube to the Tilt Mechanism. Be sure to point the “coax port” on the base of the support tube in the same direction as the T-Bolt of the Tilt Mechanism.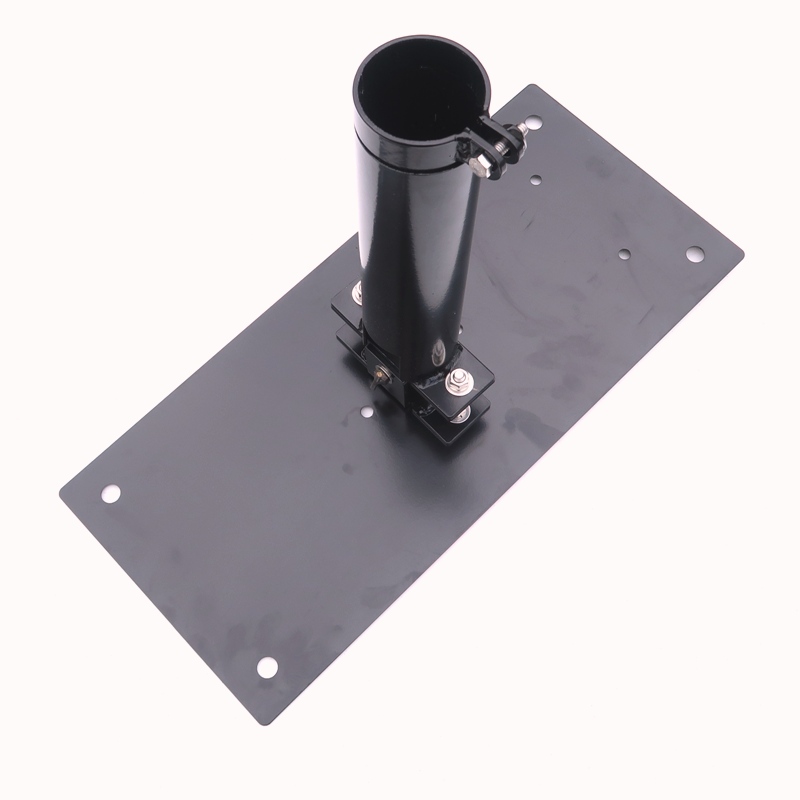
(Without Tilt Mechanism)
Attach the Support Tube to the Base plate. 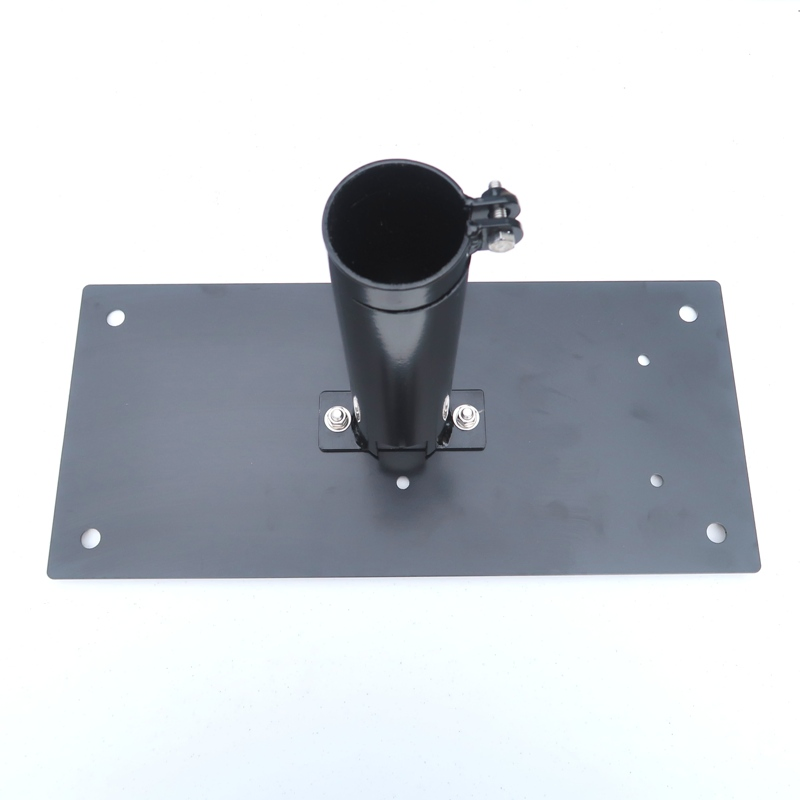
Step 3
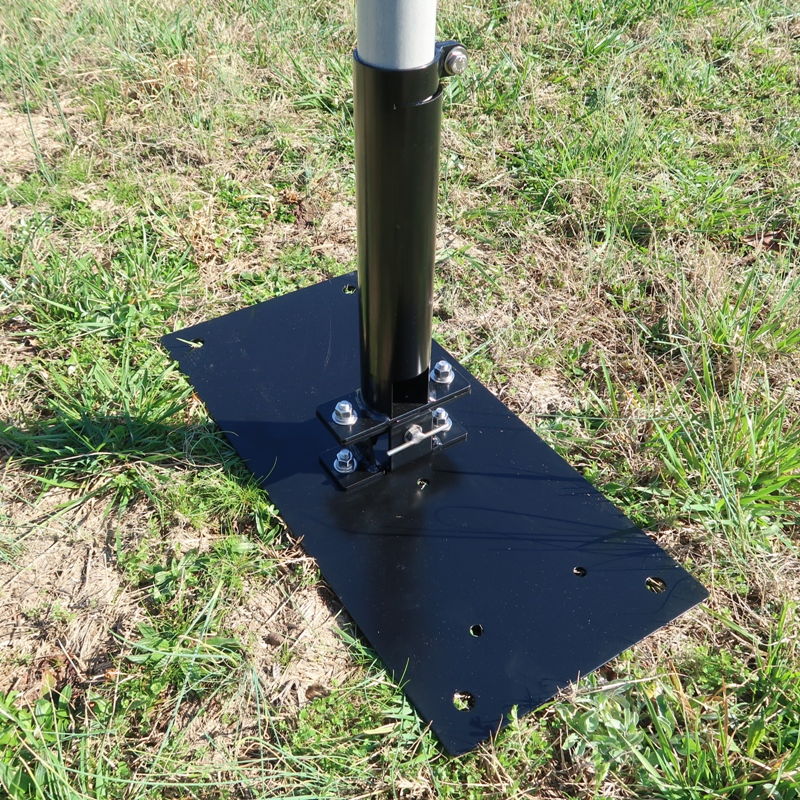
Fully assembled Ground Base Mast Mount
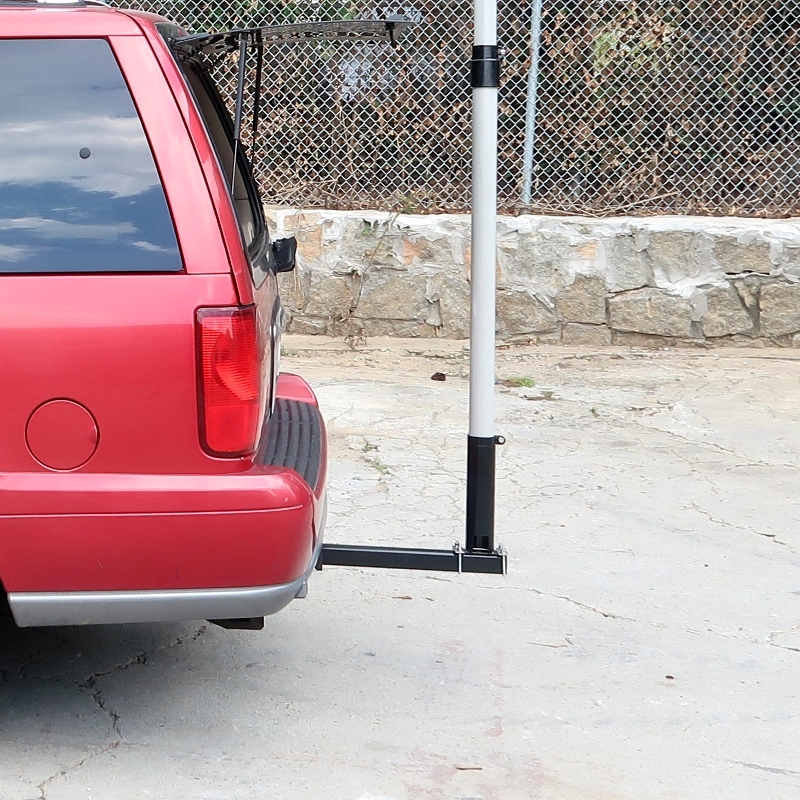
Drive-On Mount Assembly
The Drive-On Mount uses the following components:
1x Mast Support Tube
1x Tilt Mechanism (optional)
1x 10″ x 22″ Base Plate
4x 3/8″ Stainless Steel Bolts (4x are needed if using the optional Tilt Mechanism, 2x if used with no Tilt Mechanism)
Step 1
(If you did not select the tilt mechanism option, proceed to Step 2)
Attach the Tilt mechanism to the Base Plate. Use the holes in the base plate that are located at one end of the 10″ x 22″ base plate.
Step 2
(With Tilt Mechanism)
Attach the Support Tube to the Tilt Mechanism. Be sure to point the “coax port” on the base of the support tube in the same direction as the T-Bolt of the Tilt Mechanism.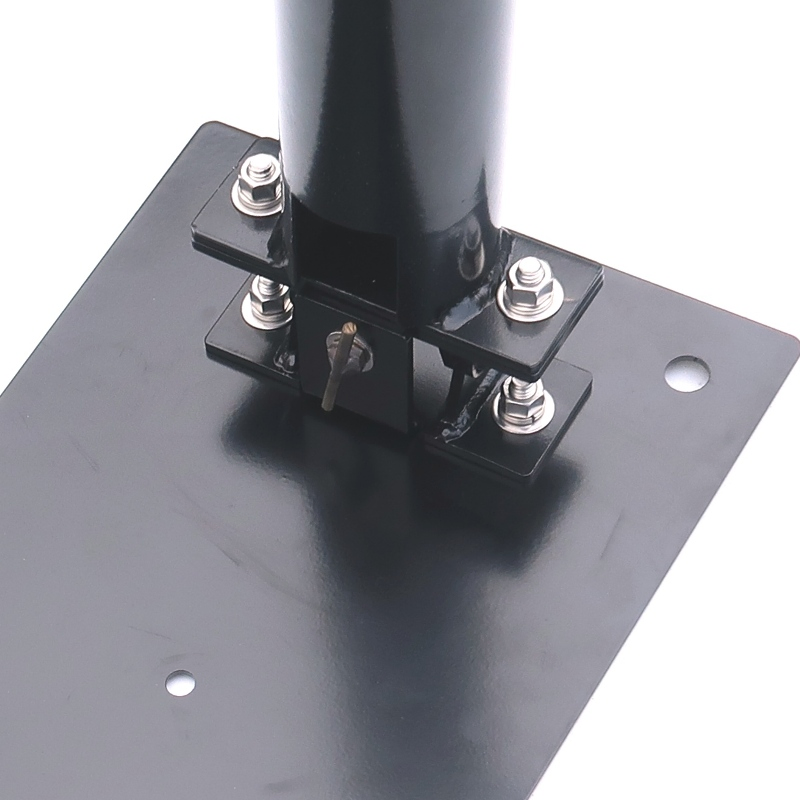
(Without Tilt Mechanism)
Attach the Support Tube to the Base plate. Orientation is not critical, but placing the “coax port” facing AWAY from the vehicle will allow easier access to the clamping bolt at the top of the support tube.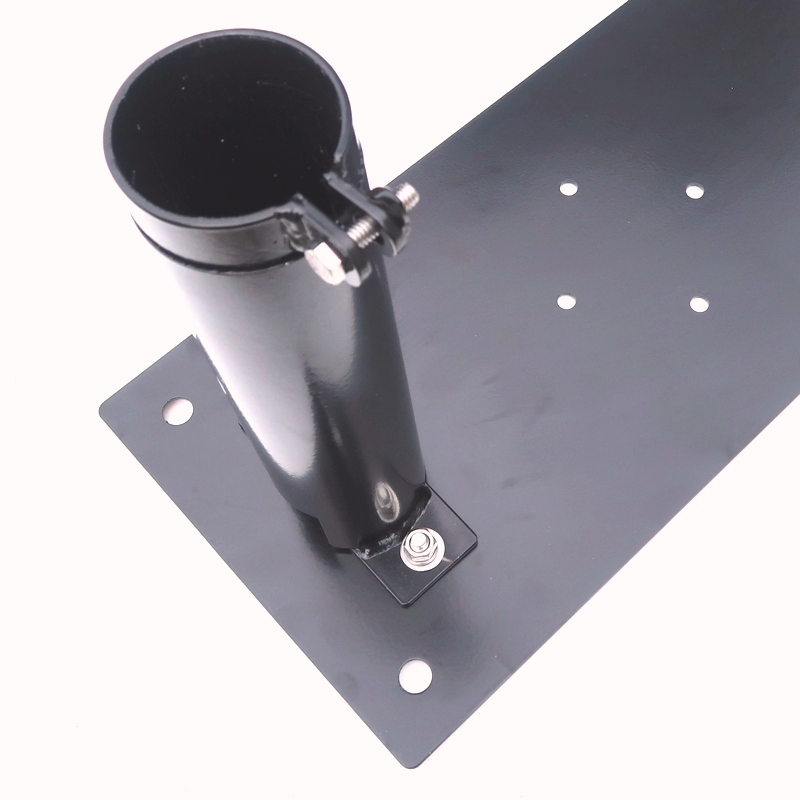
Step 3
Fully assembled Drive-On Mast Mount
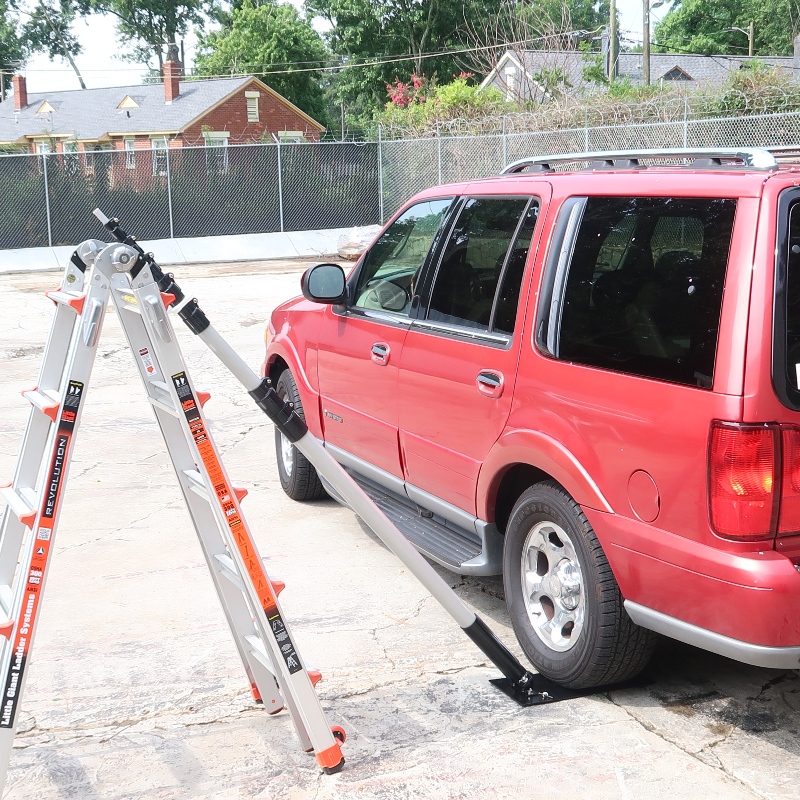

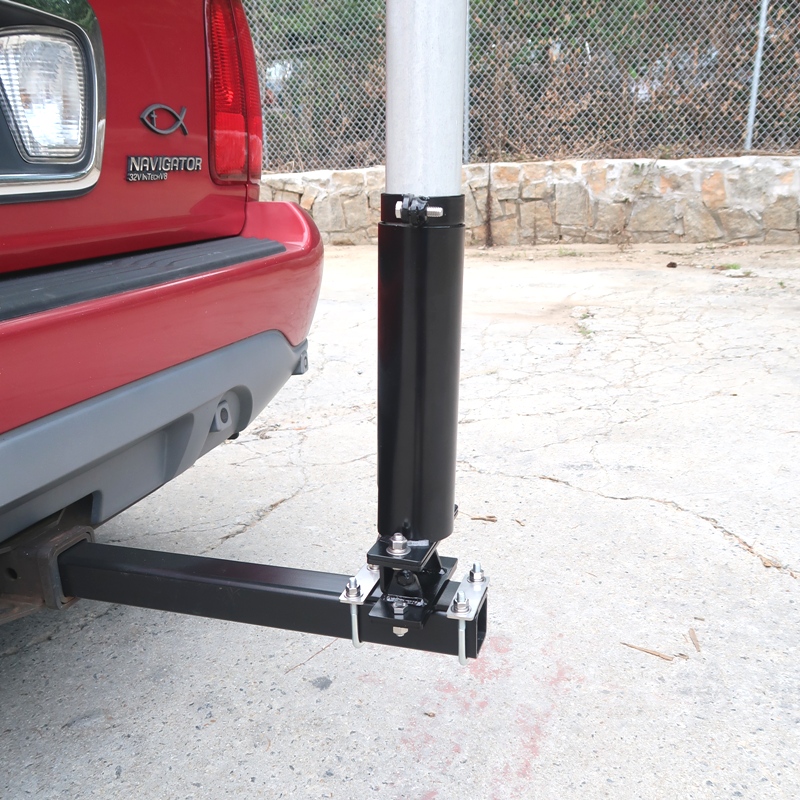
Trailer Hitch Mount Assembly
The Trailer Hitch Mount uses the following components:
1x Mast Support Tube
1x Tilt Mechanism (optional)
1x Cross Adapter (for use with Tilt Mechanism option)
4x 3/8″ Stainless Steel Bolts (for use with Tilt Mechanism option)
1x Hitch Bar (either 23 inch or 10.5 inch)
2x sets of Stainless, Square, U-Bolt Hardware
Step 1
(If you did not select the tilt mechanism option, proceed to Step 3)
Attach the Tilt mechanism to the Cross Adapter.
Step 2
Attach the Tilt Mechanism and Cross Adapter assembly to the end of the hitch bar that DOES NOT have the cross drilled holes.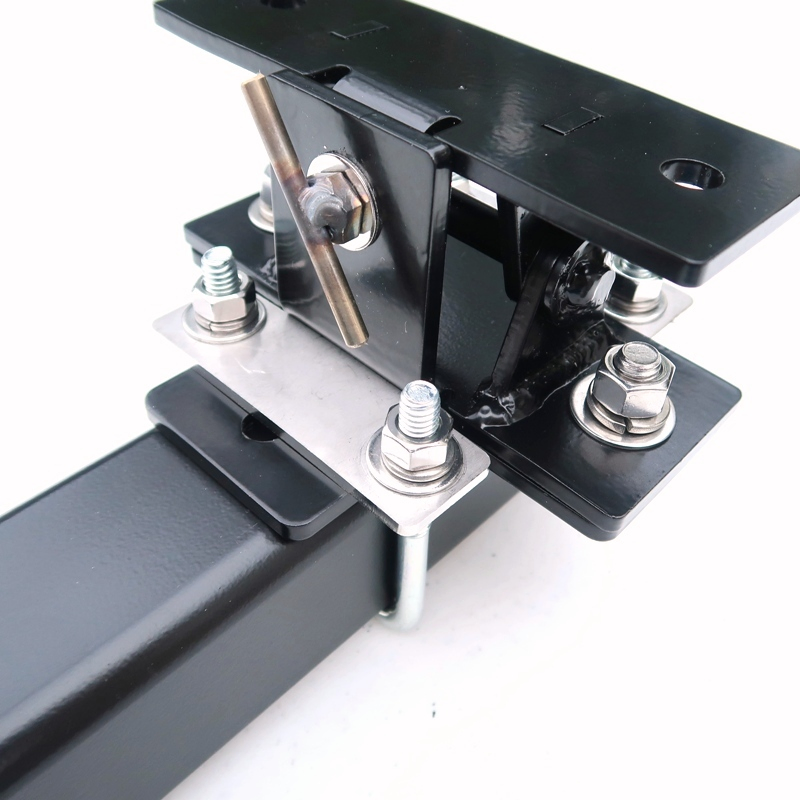
BE SURE to install the assembly with the T-bolt FACING THE VEHICLE. This will allow the tilt mechanism to operate tilting back behind the vehicle.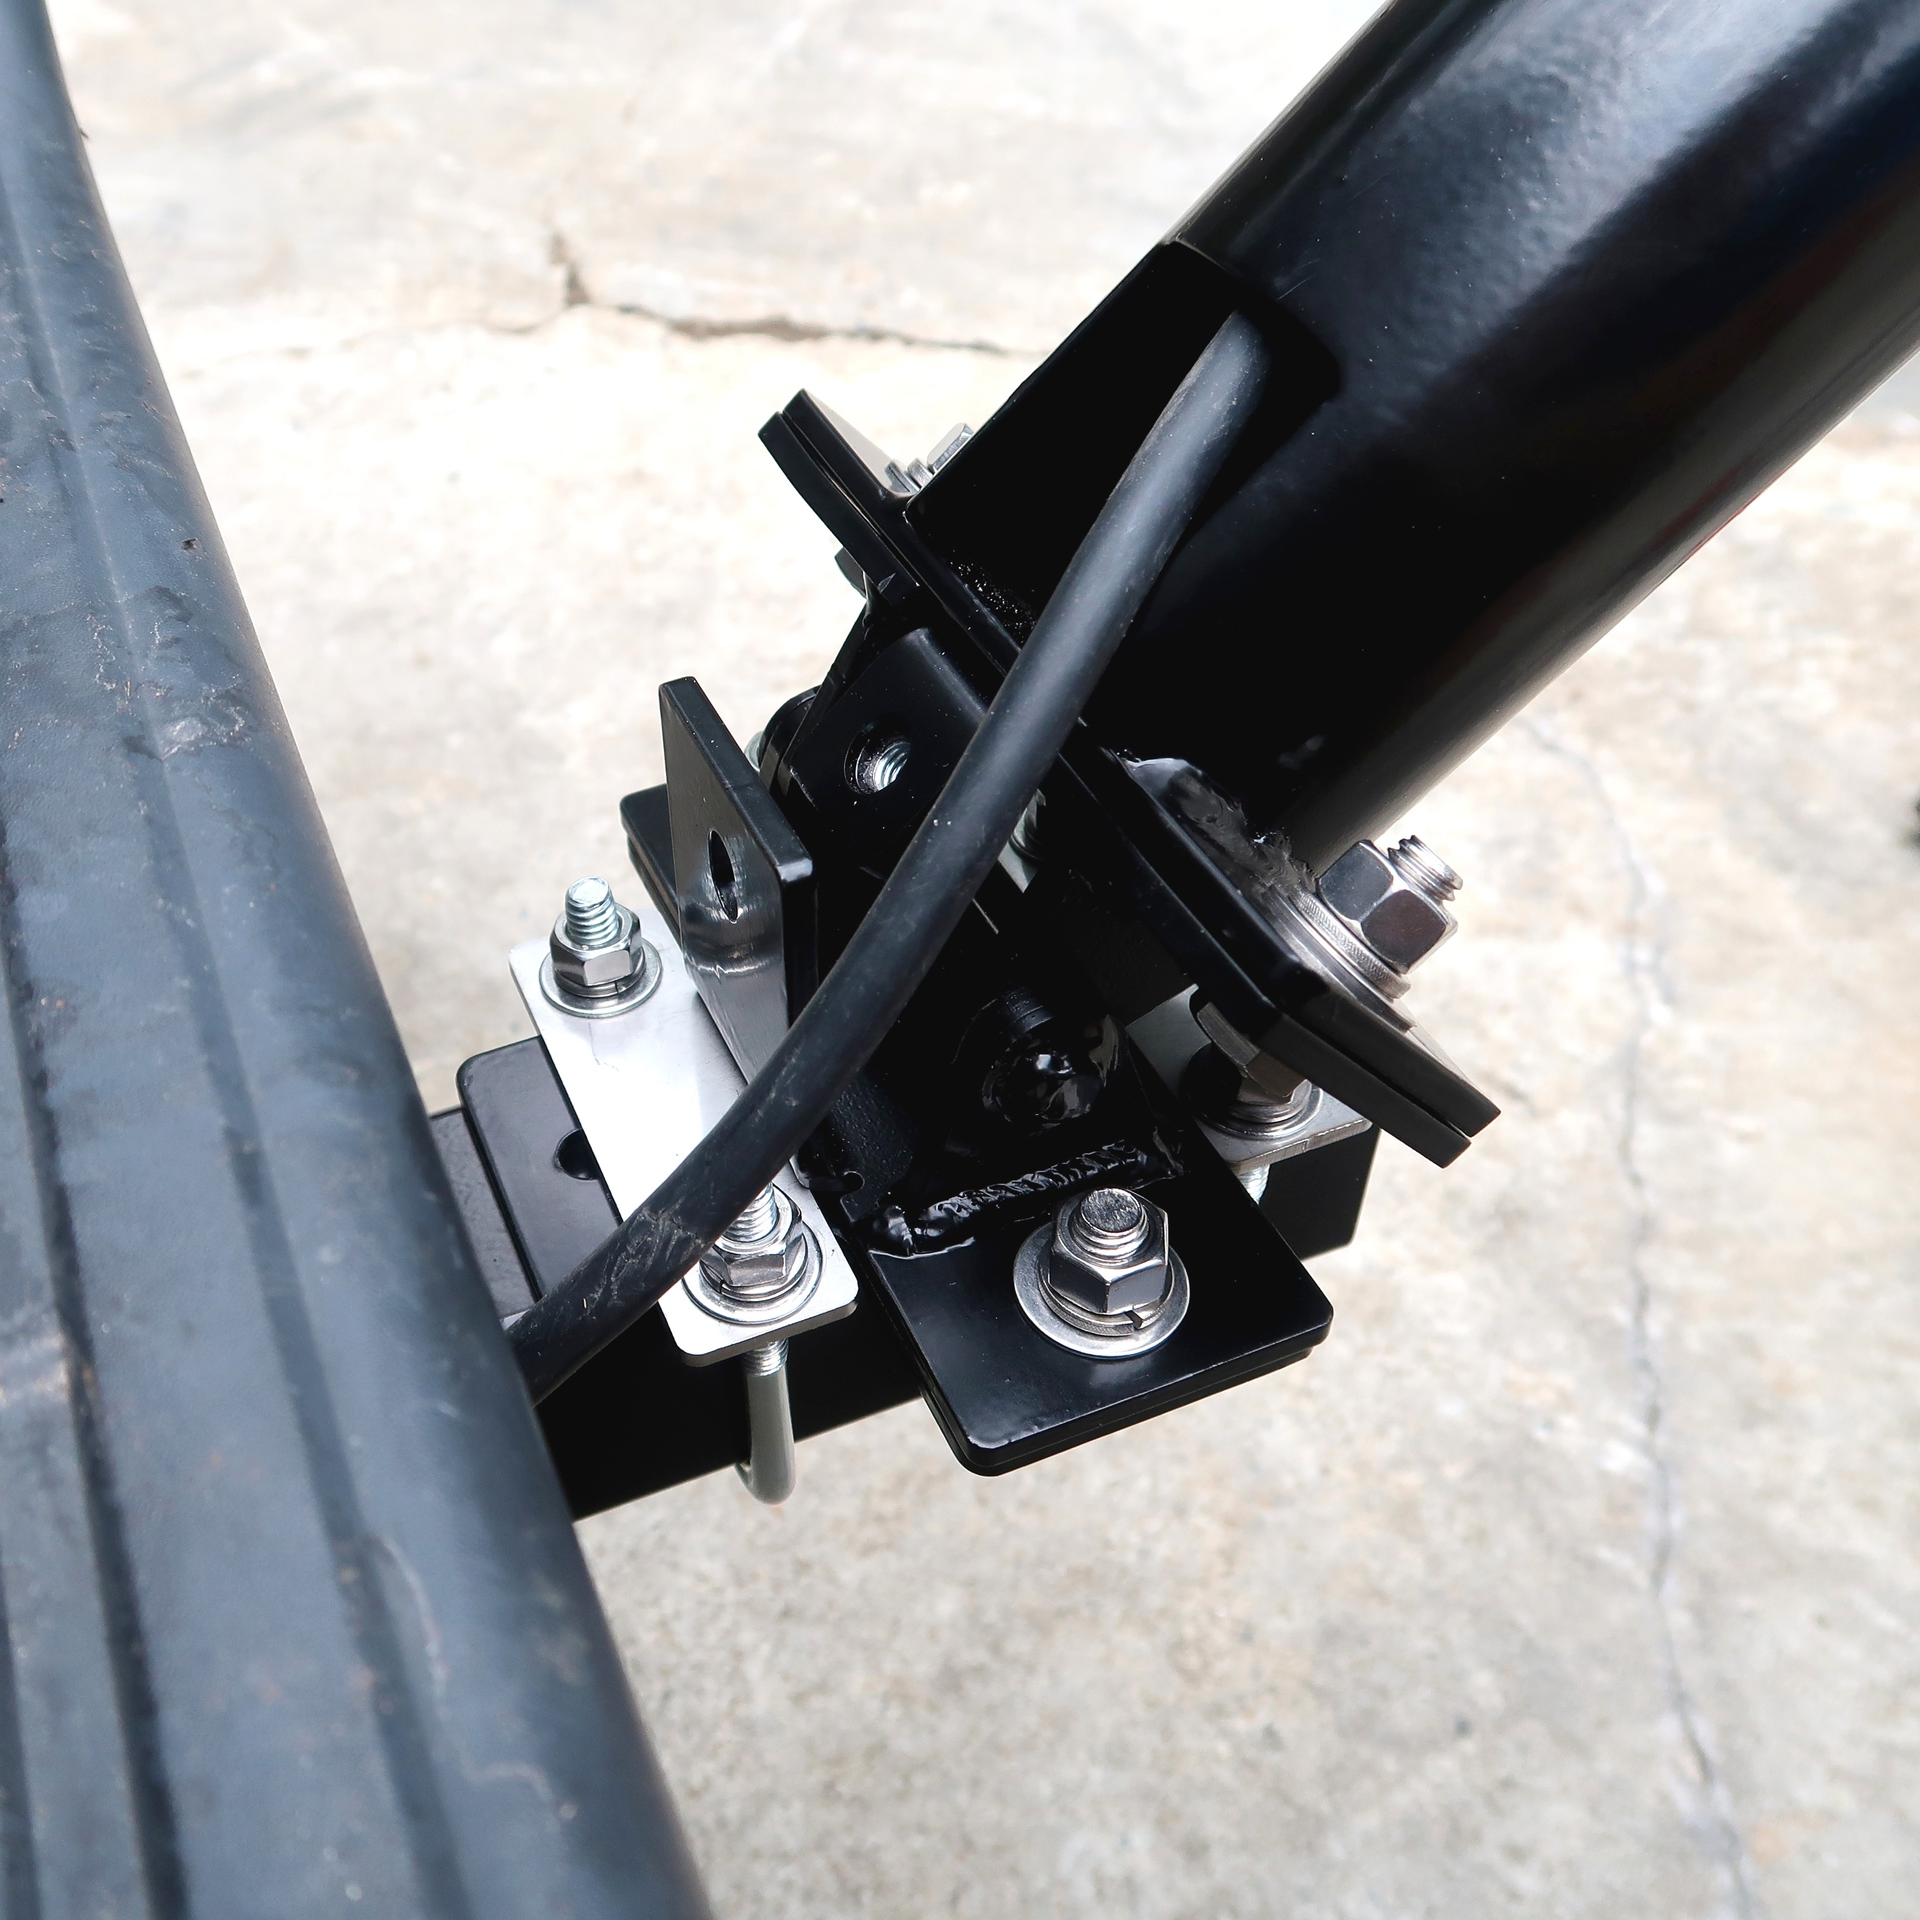
Step 3
Attach the Support Tube to the Hitch Bar Assembly