Here it is. The long awaited step-by-step assembly guide for the “MK” series of masts. This also covers the installation for the quick clamps to any other material with the correct wall thickness. This includes topics like: how to assemble it, how to mark the tubes properly, how to tighten the clamp screws to the proper tightness, and also what NOT to do and what to avoid.
Assembling the mast
Assembly will take around 30 minutes from when the package is opened.
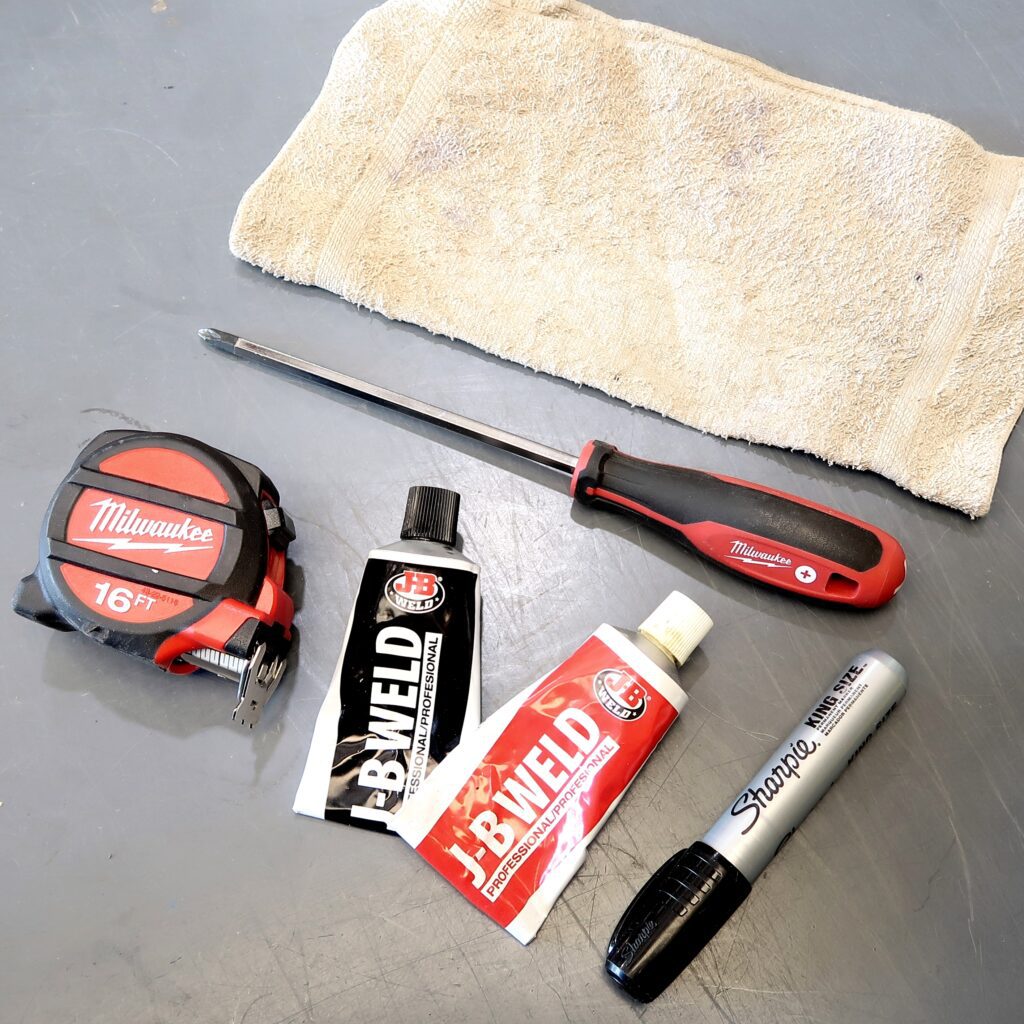
Things you will need to assemble the mast:
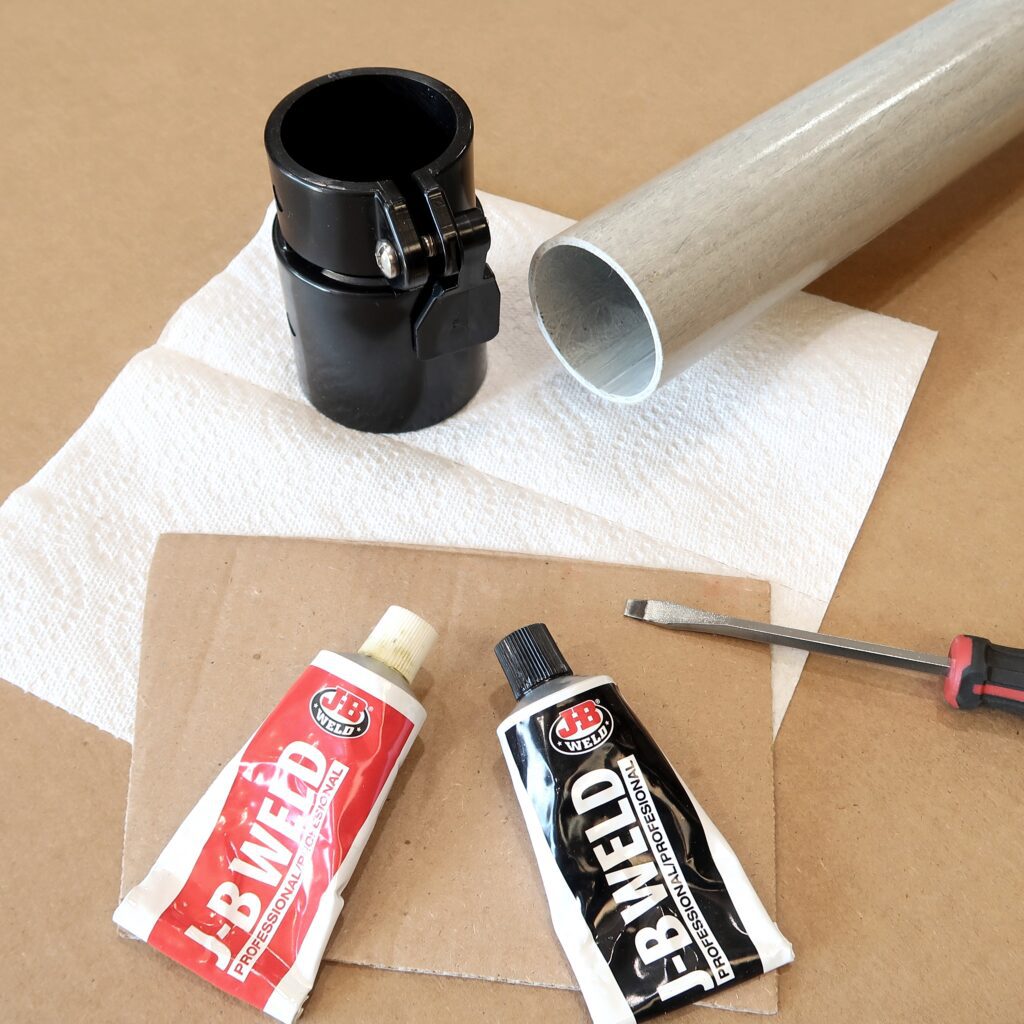
- 1x pack JB Weld 2-Part Epoxy (the Original Coldweld Formula)
- 1x Damp cloth or shop rag (used to remove surface dust)
- 1x #3 Phillips head screw driver. (the #3 is a size reference for the size of the phillips head)
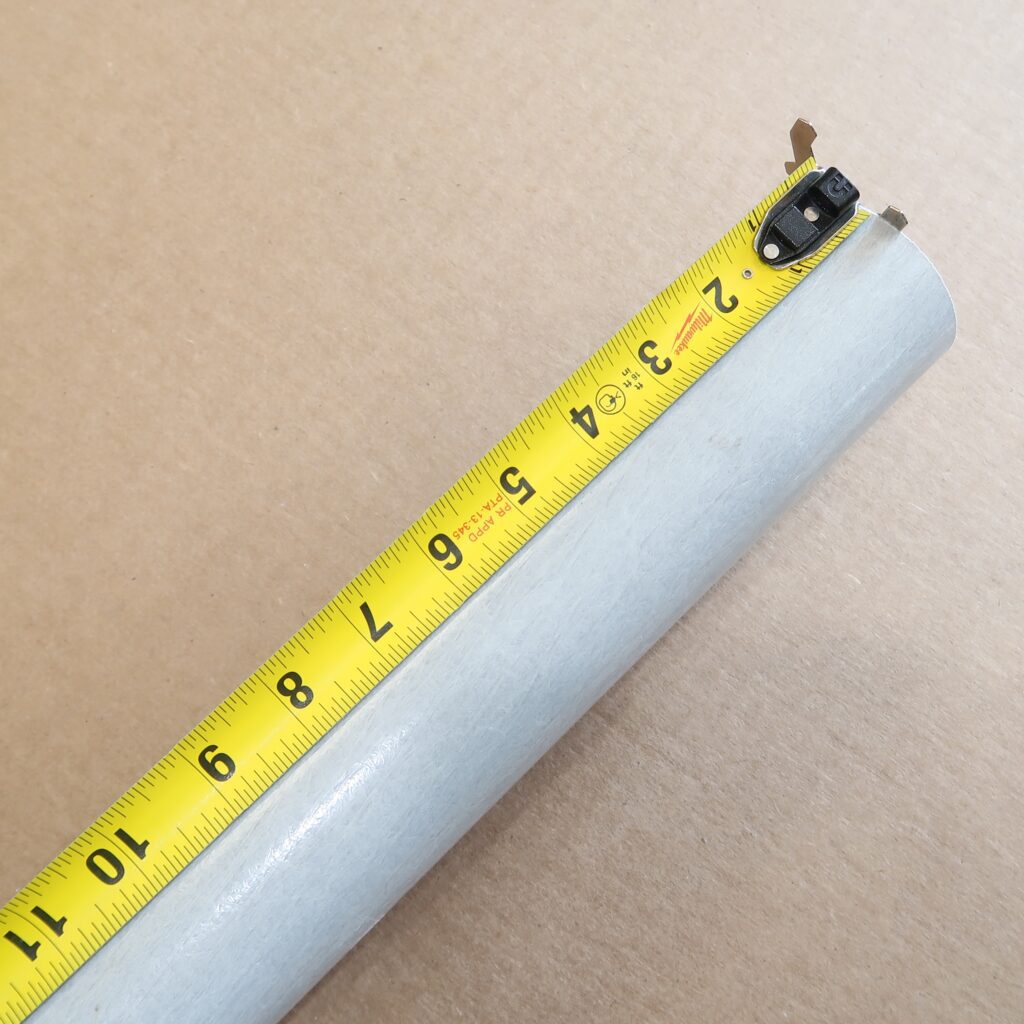
- 1x Tape Measure
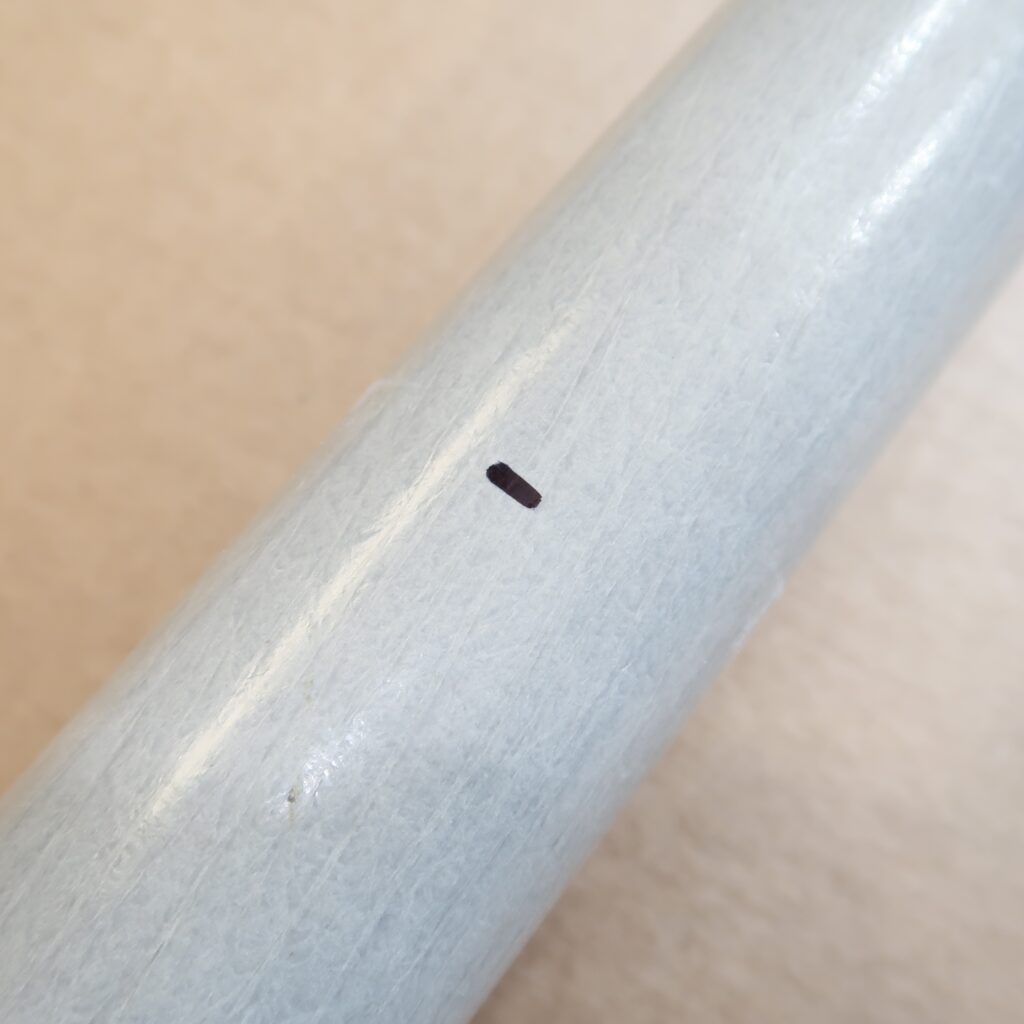
- 1x Big Black Sharpie (used for marking the extended position of the tubes)
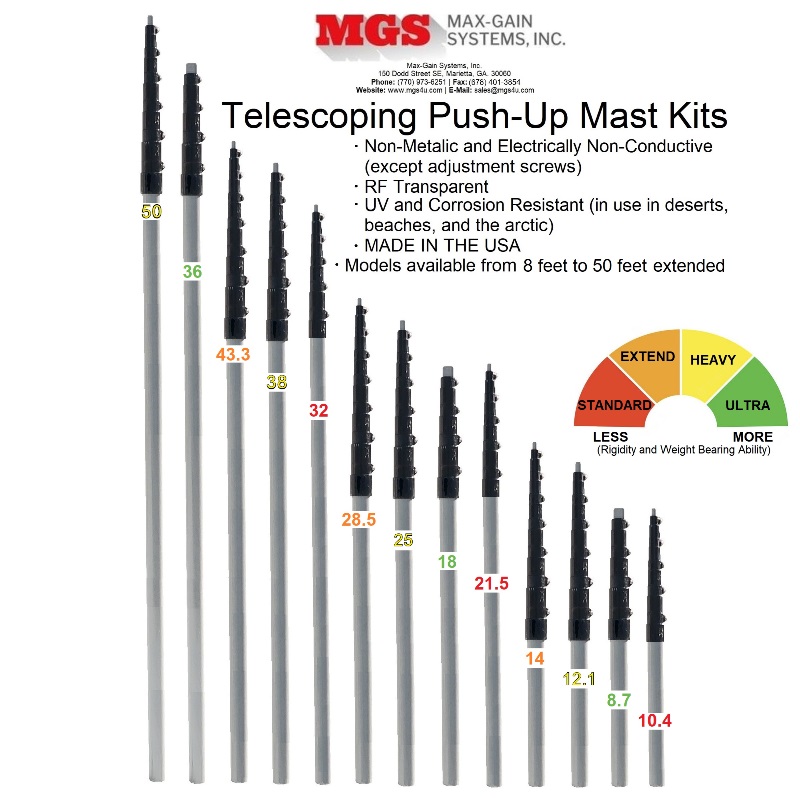
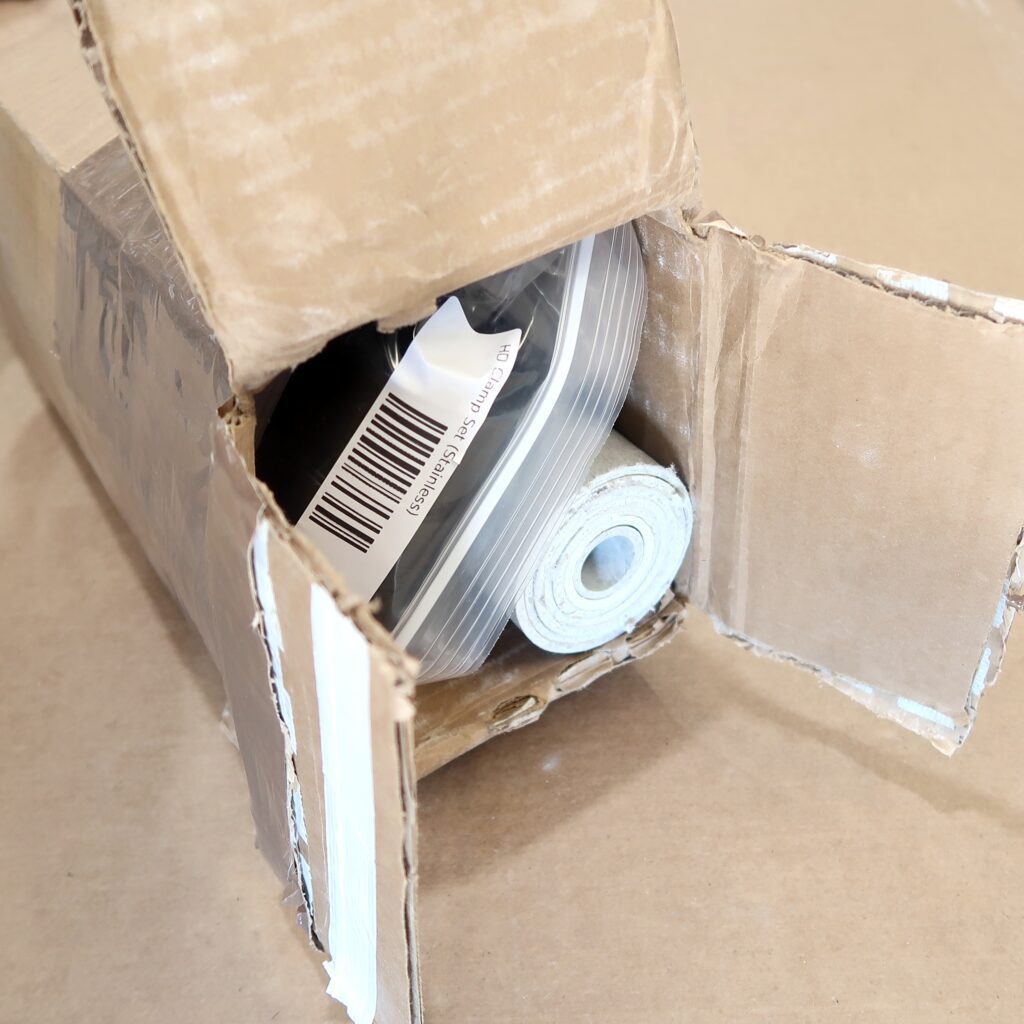
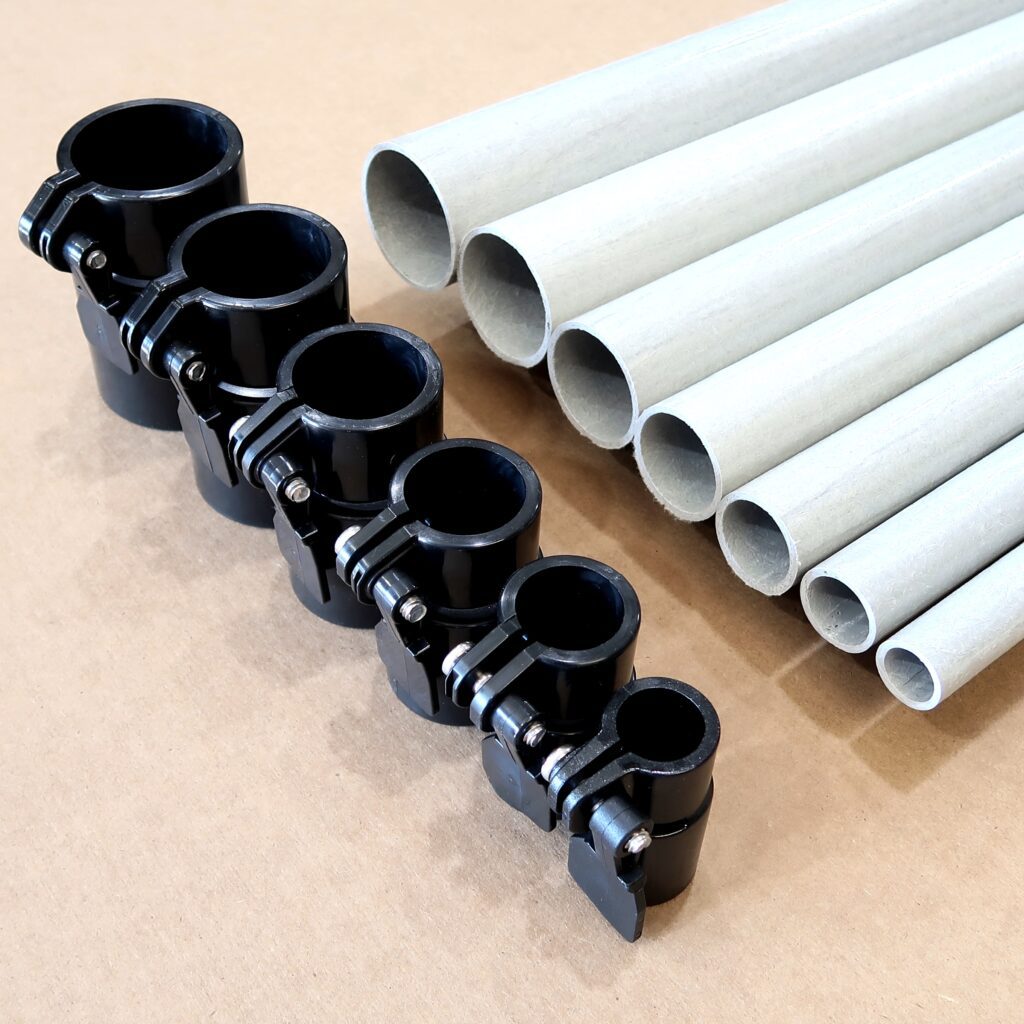
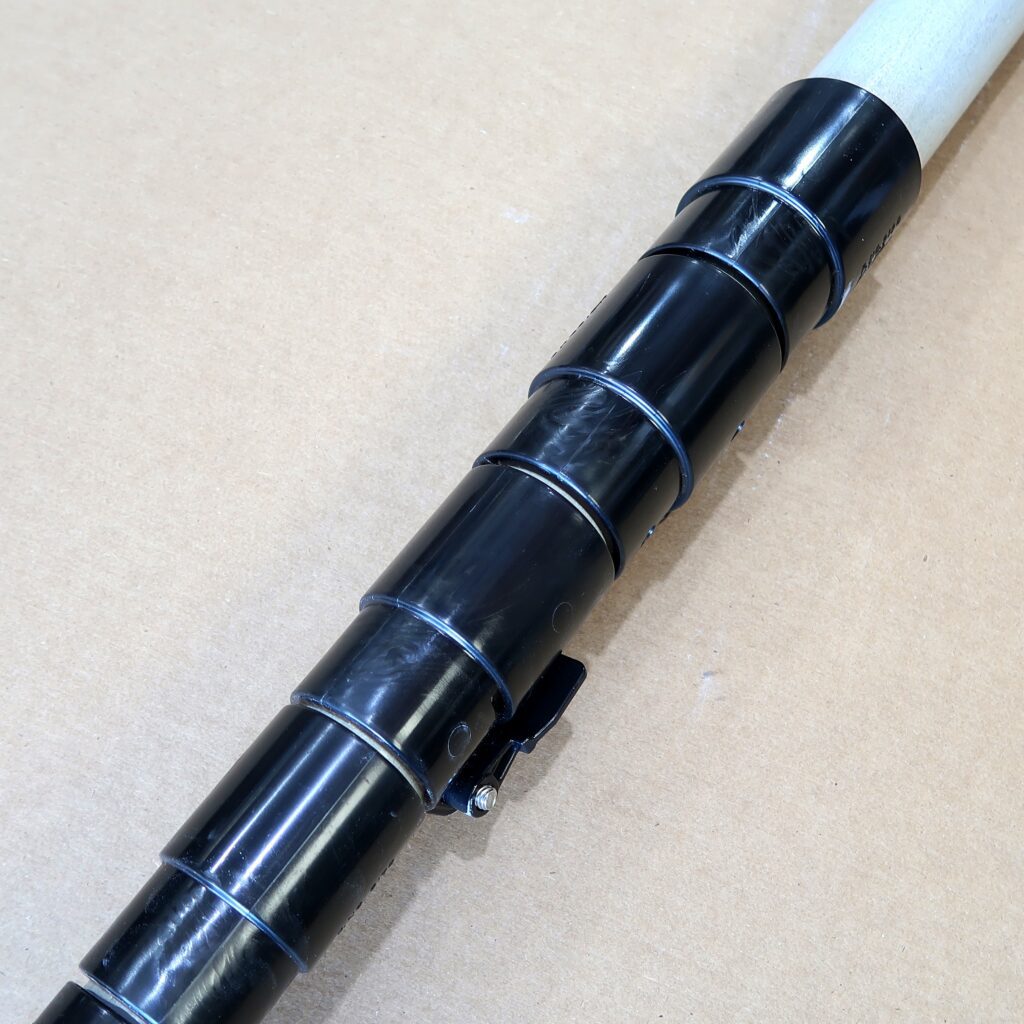
The first step is to unbox your fiberglass tubes and telescoping tube clamps. Be sure you have the correct number of fiberglass tubes and the corresponding tube clamps. EXT masts come with (7) clamps and (8) fiberglass tubes, HD masts come with (6) clamps and (7) fiberglass tubes, and STD masts come with (5) clamps and (6) fiberglass tubes.
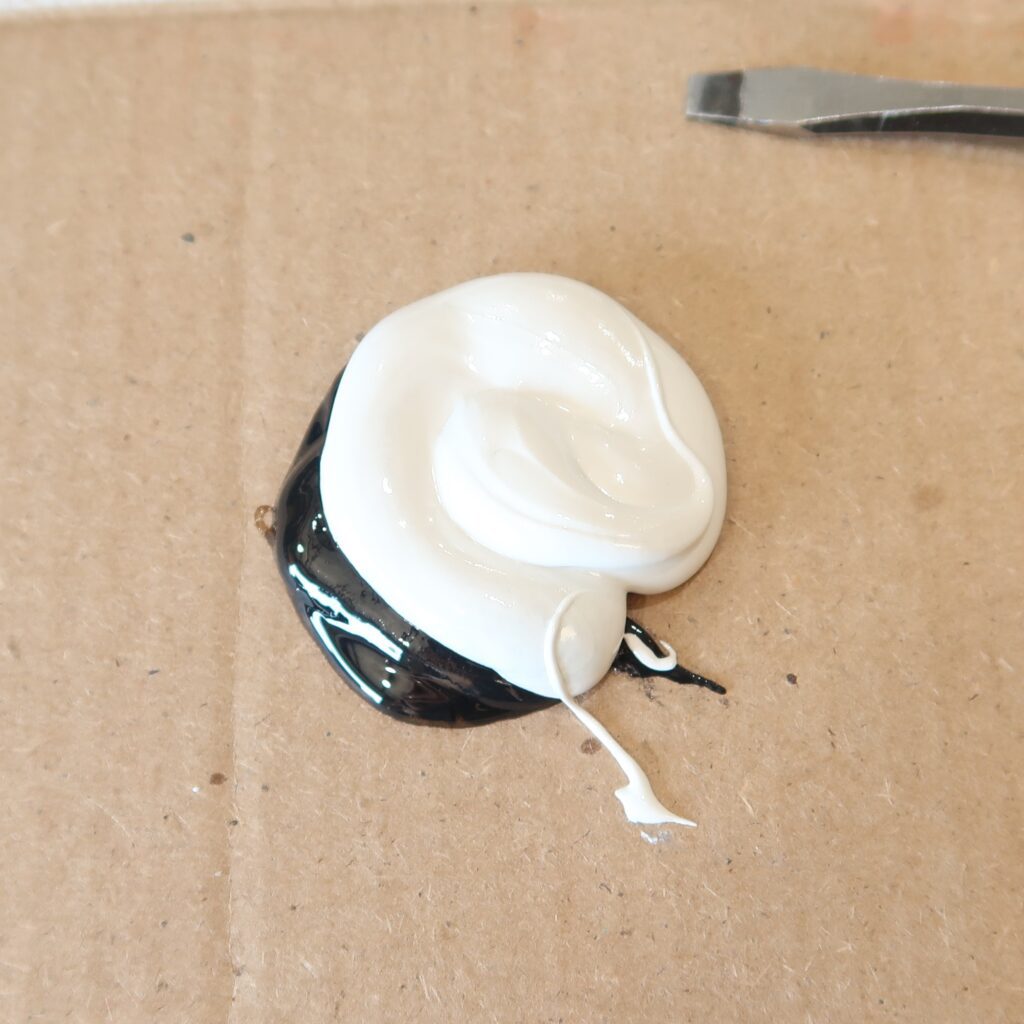
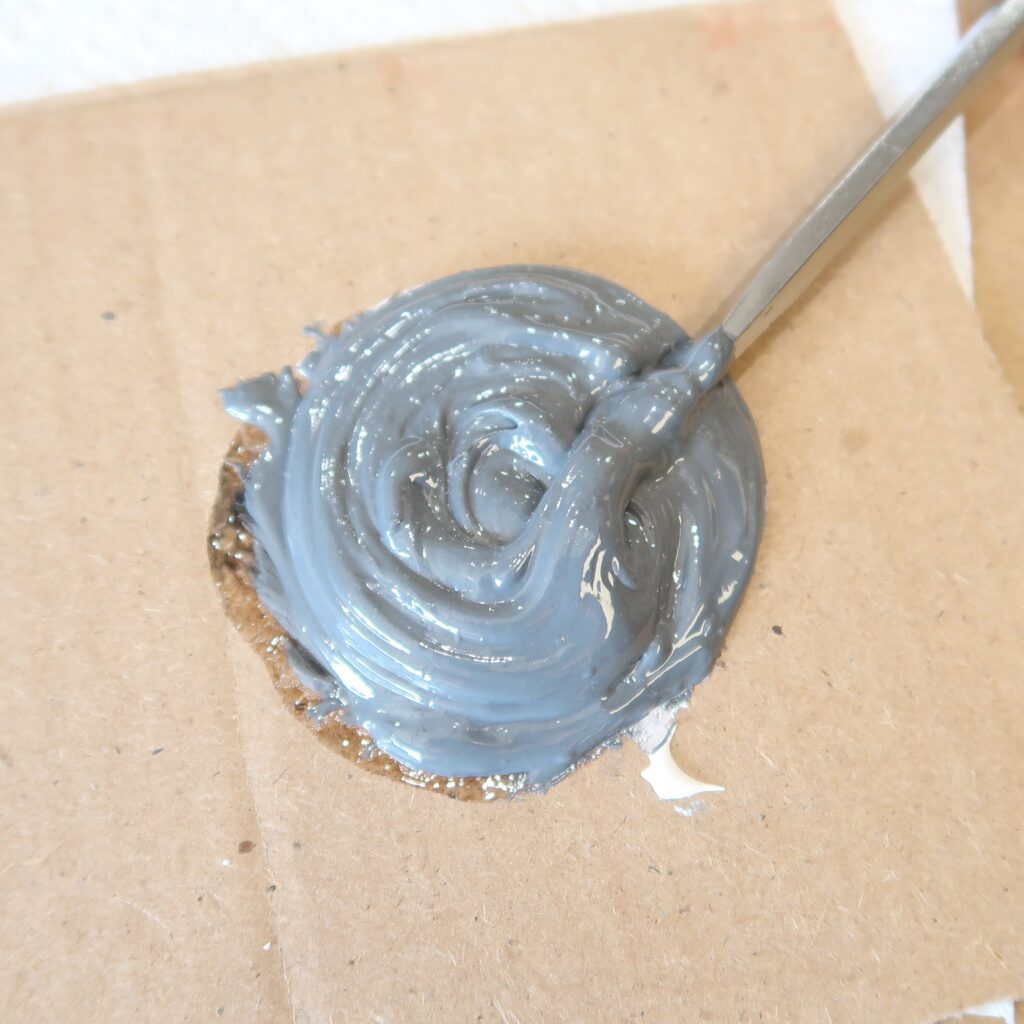
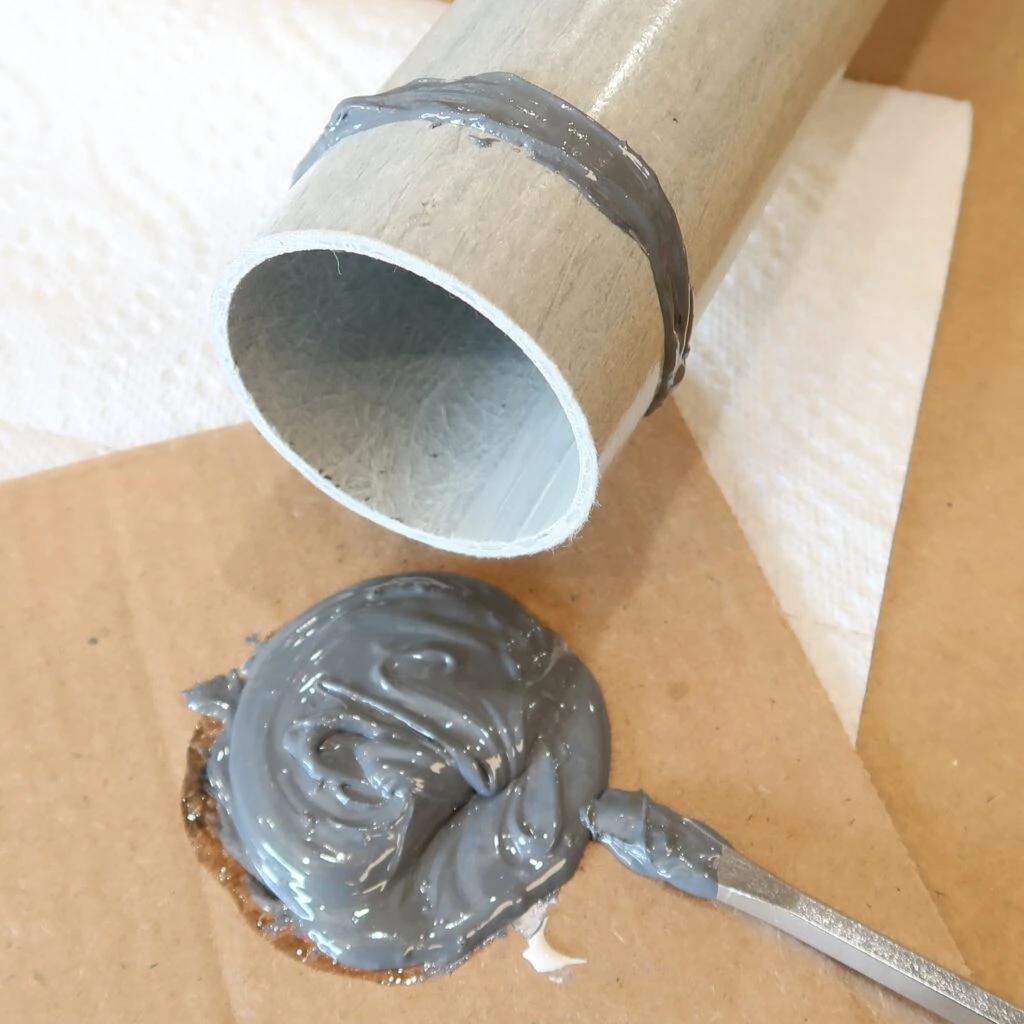
Next we need to attach the clamps onto the tubes. I like to do this permanently with JB Weld 2 Part Epoxy (The Original Coldweld Formula). A standard package (1 oz) from the hardware store should do the trick. Squeeze out some of the hardener onto a surface you will throw away afterwards. I used a cut off piece box I had around. Then, on top of the hardener, squeeze an equal amount of the resin. Be sure to have paper towels at the ready at this stage. JB Weld starts to set quickly and you will need to be sure you do not drip any of this on to any unwanted area. Mix the JB Weld up by swirling it and folding from the outside of the pile inward. Once the black and white parts are mixed it should turn completely gray.
Applying the Adhesive
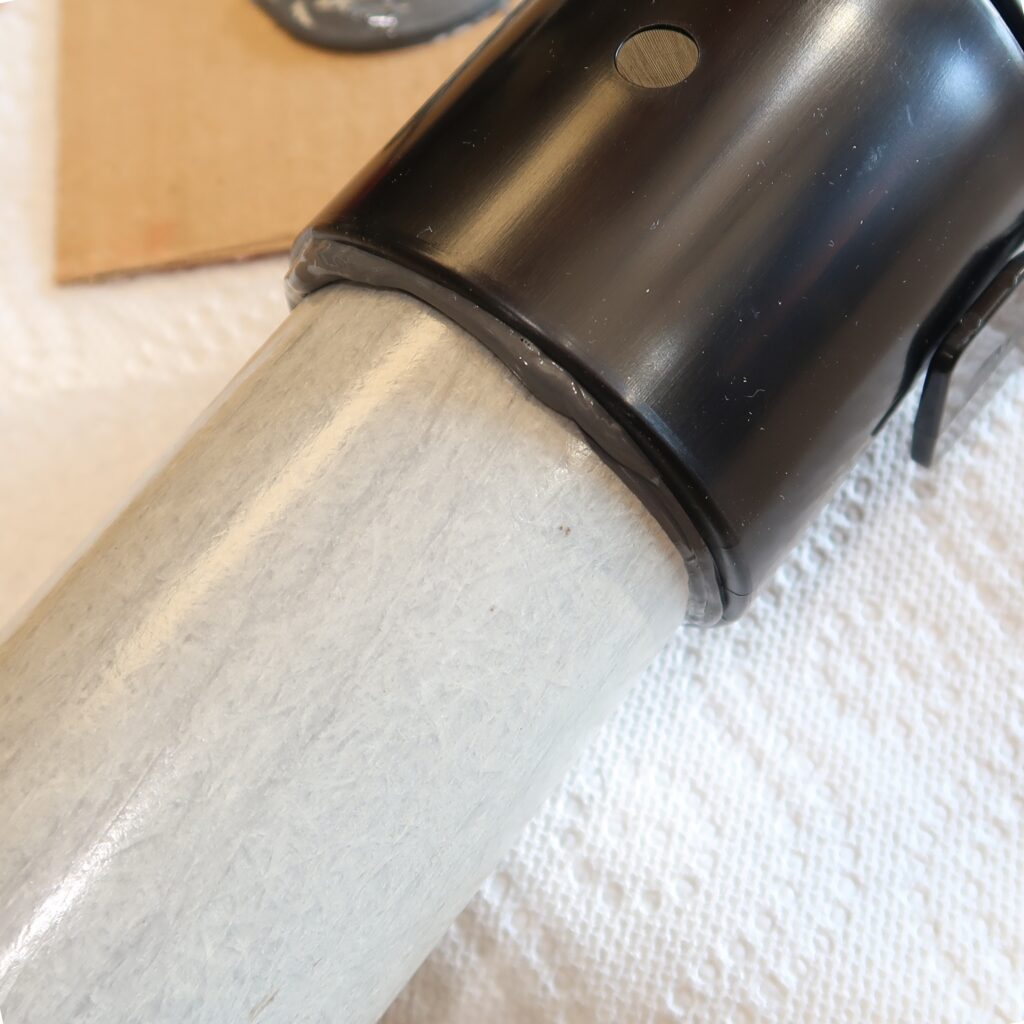
The adhesive does not need to be smeared all over the tube. We are going to make one thick bead of adhesive, one inch down, from one end of the tube. When the thick bead is done being applied to the tube, place the corresponding telescoping tube clamp onto the tube. Rotate the clamp a quarter turn, left and right, while slowly pressing the clamp onto the tube. This will smear the adhesive around plenty and this also avoids the largest potential problem of adhesive migrating its way up the tube and squeezing its way over the edge of the tube and inside the clamping area. This would make an impassible block of adhesive. Following these directions will completely avoid that. Right now the adhesive is still a little runny so be sure to set the tube down on a flat surface AND, before you let go of the tube and clamp, make sure the telescoping tube clamp is completely seated. If not, this could create a “binding point” because the clamp would not be aligned.
Once you have glued on all of the clamps set them all on that same flat surface to fully cure. Be safe and put a paper towel under the clamps so in the case you have a little “seepage” it will pool on the paper towel that can be thrown in the trash later. JB Weld 2 Part Epoxy (The Original Coldweld Formula) says you can start using your parts in about 4 hours, but I like to give it a full day.
Marking the Tubes
Now that the mast clamps are completely installed onto the ends of the tubes you will need to mark the tubes where we need to stop raising the mast once we see the line. The line placement depends on the length of the tubing the mast came with. For masts with 93 inch long tubing (8.5 inches), 72 inch long tubing (8 inches) 46.5 inch long tubing (4.25 inches), and 23.25 inch long tubing (3 inches). You will be measuring from the bottom end of each tube. We will be using the rest of the clamps to make our full line in the next step during assembly.
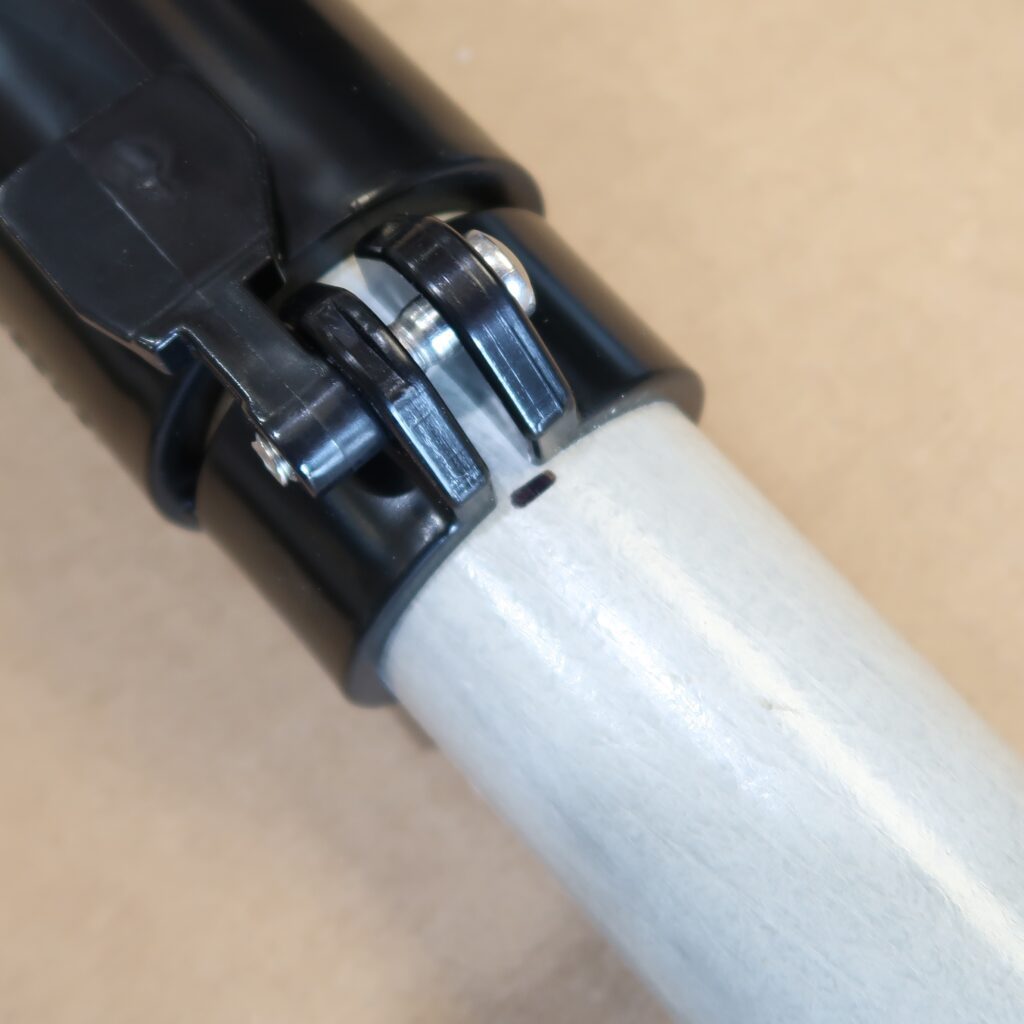
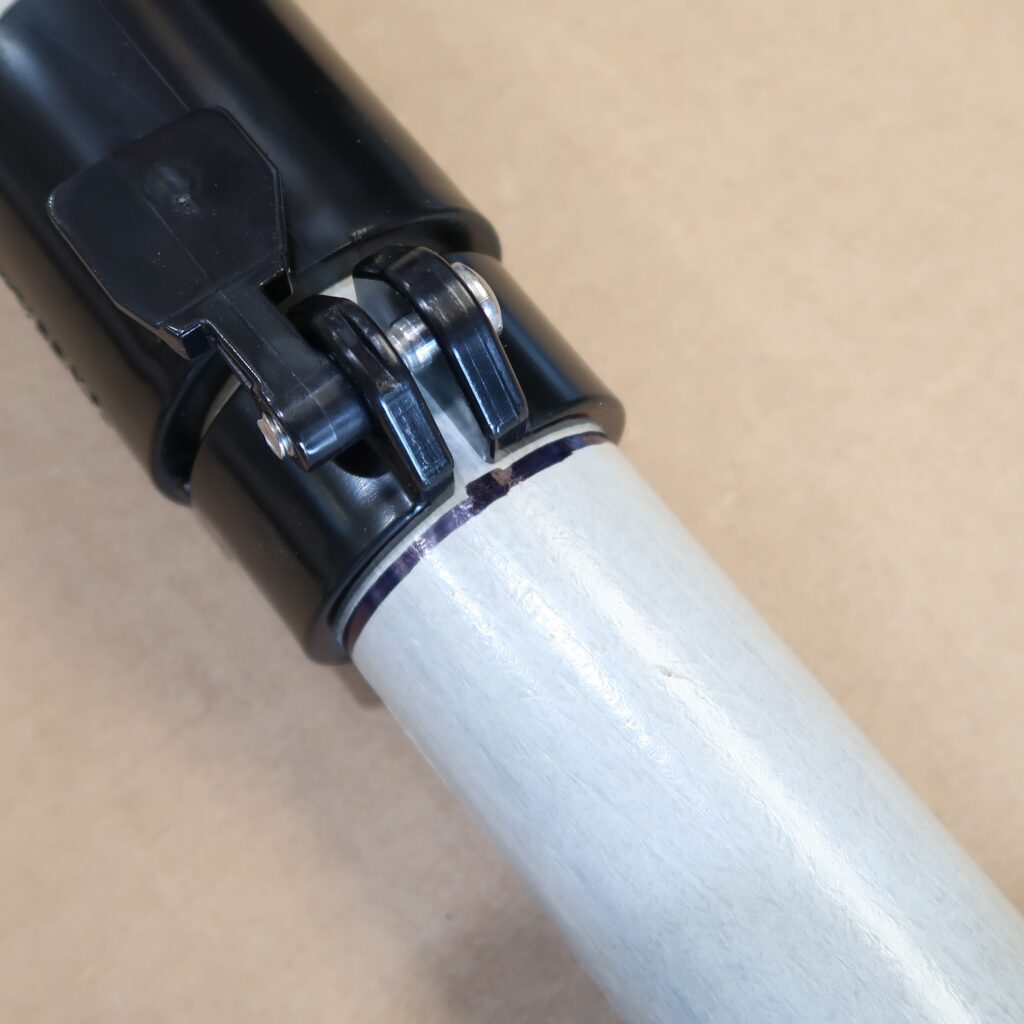
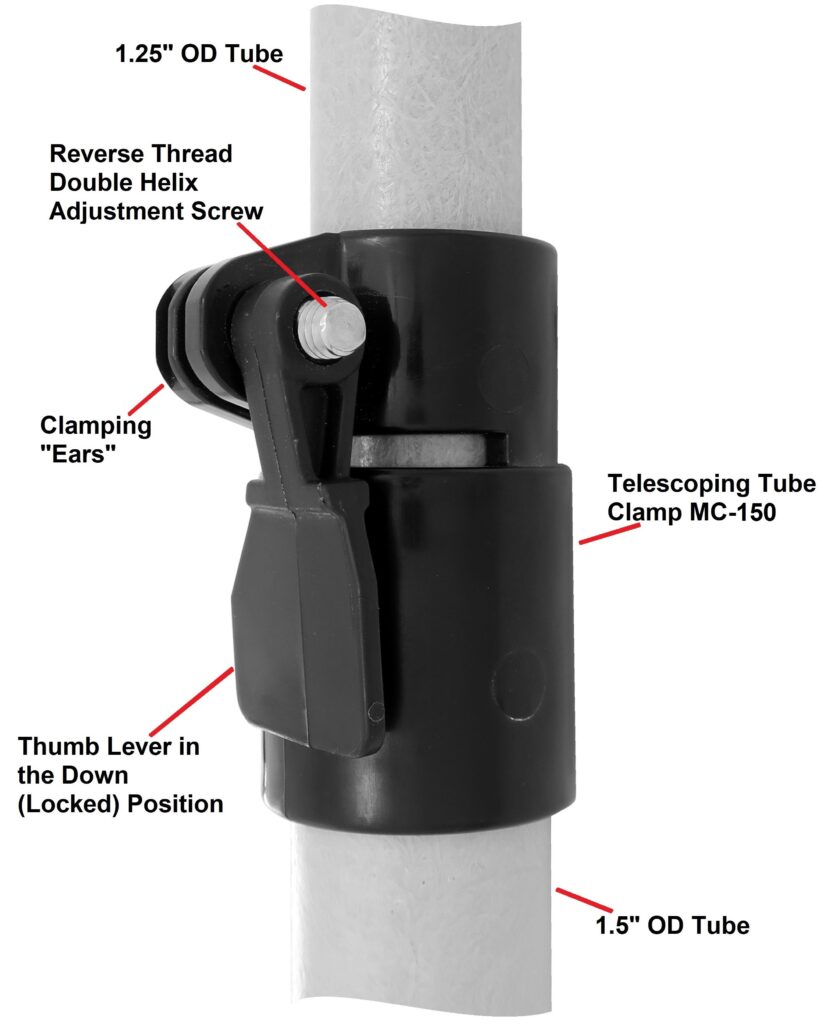
Adjusting the Clamping Screws
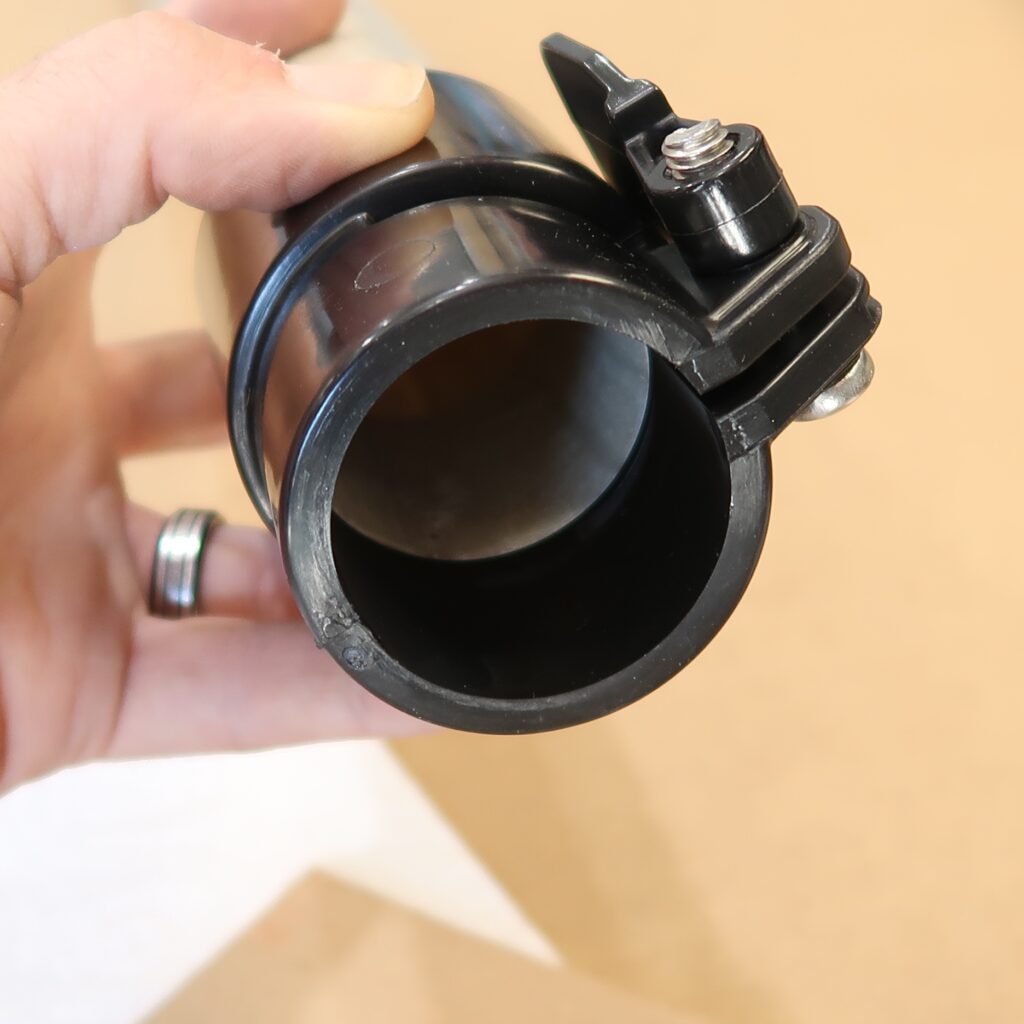
After the Quik-Clamps are cured, you can then raise the thumb-clamp levers and insert the tubes within one another. You will notice a screw in the clamp. This screw is used to adjust the tension of the clamping mechanism. With a Phillips head screwdriver, (be certain to use a large enough Phillips screwdriver to properly engage the large screw slots. (Preferably a #3 Phillips). Tighten the screw just to the point before it hinders passage of the inner tube. The screw is REVERSE THREAD, so turn COUNTERCLOCKWISE to tighten. TEST the thumb clamp at that point, and make certain that you have the tension adjusted properly so that you may extend the inner tube, and that when the thumb clamp is in the “down” position, that the inner tube is gripped FIRMLY. It is important to not over-tighten the screw. The thumb clamps have tremendous leverage, and if over-tightened, something HAS to give… (probably one of the sides of the clamp “ears”). Try this adjustment a few times until you find the perfect setting. Do not use thread-lock compound on the screws. It is not necessary, and thread-lock compound is one of the very few things that can attack and weaken the material used to make the clamps.
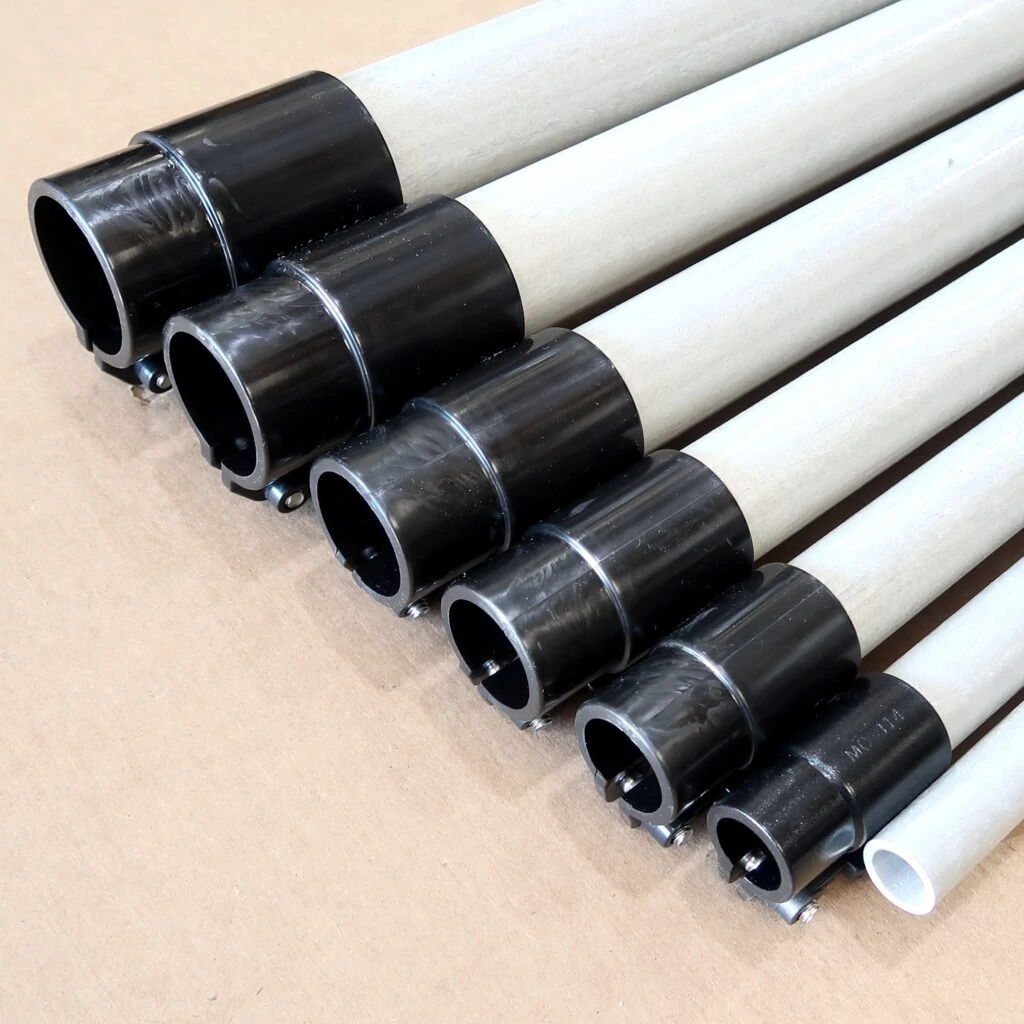
Finished!
Once the clamps are completely tightened to the right tightness the mast is completely assembled. Next we are going to look at installing this mast into the brackets and also how to make the coax runs we need in order to get our signal from the helium miner up to the antenna.